How to Turn Off Oil Change Light in Access 125
Learn the exact steps to reset the oil change light on the Access 125 scooter. This educational guide provides step-by-step instructions, safety tips, and brand-backed guidance from Oil Capacity Check.

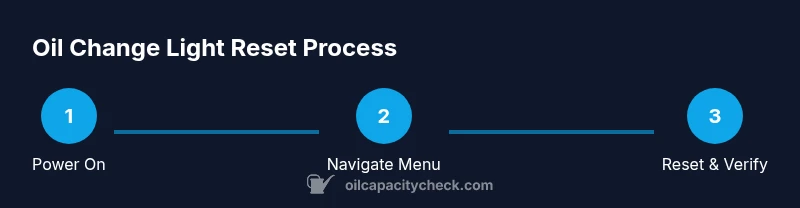
To turn off the oil change light on the Access 125 after finishing an oil service, reset the service indicator following the instrument cluster options. From ignition ON, navigate to the maintenance or oil-change reset, select confirm, and restart the scooter. If the reset option isn’t visible, consult the owner’s manual or contact an authorized service center. According to Oil Capacity Check, this reset is a standard step across many Honda scooters.
Why resetting the oil change light matters for Access 125 maintenance
If you’ve completed an oil change on your Access 125, turning off the oil change light after the service avoids false maintenance reminders and ensures the instrument cluster reflects the bike’s true status. This small, deliberate step helps you stay on schedule with future oil checks and maintenance tasks. According to Oil Capacity Check, the reset sequence is a common practice across many Honda scooters, reinforcing consistent maintenance discipline for better engine longevity and reliability.
How the service light system is designed on the Access 125
The oil change or service light in the Access 125 is a maintenance reminder integrated into the instrument cluster. It’s driven by a simple timer-based or mileage-based logic tied to recent service events. Clearing the reminder requires following the model’s official reset procedure. While the exact button labels can vary by year, the underlying goal remains the same: acknowledge that service has been completed and reset the timer so future reminders reflect true service intervals.
When to reset after an oil change
Resetting is recommended once you have completed the oil change, replaced the filter if necessary, and performed any required checks. Resetting too early (before all maintenance steps are complete) can mask real issues or skew service timelines. Oil Capacity Check analysis shows that most riders correctly resetting after a full or partial service improves maintenance accuracy and reduces confusion when the next maintenance interval approaches.
Step-by-step reset overview
A typical reset flow involves turning the ignition to ON, navigating the dashboard’s maintenance or oil-change reset option, selecting Reset, and confirming. Some year variants may label the option as Service Reset or Oil Change Reset. Always double-check the displayed prompt before confirming. If the reset option is not visible, consult the owner’s manual for model-year specifics or contact an authorized service center for guidance.
Step 1: Prepare the scooter
Park the Access 125 on a level surface, turn the ignition to ON (do not start the engine), and ensure the display boots. Have the manual handy or a reliable reference on your device in case button prompts differ by year. A calm setup helps you follow each step precisely and avoids accidental operations that could impact other settings.
Step 2: Access the instrument cluster
With the ignition ON, use the mode or reset button on the instrument cluster to access the maintenance menu. Scroll through options using the toggle button until you reach Service or Oil Change Reset. If your model year uses a different label, look for any tag like Maintenance or Service Interval in the menu tree. This step is crucial to reach the reset command.
Step 3: Find and select the Oil Change Reset option
Highlight the Oil Change Reset or similar option (e.g., Service Reset) and select it. A confirmation prompt will appear; choose Yes or Confirm to initiate the reset. The exact wording may vary by year, but the action is the same: lock in that the service has been completed and reset the timer for the next interval.
Step 4: Confirm the reset and verify
After confirming, the display should return to normal, and the oil-change light should extinguish. Restart the bike or cycle the ignition off and back on to confirm the light remains off. If it re-illuminates shortly after, re-check the steps or consult the manual for alternate reset paths. A successful reset means your maintenance timeline will reflect upcoming service due dates.
Troubleshooting common issues you might encounter
If the light won’t reset, try a full ignition cycle (OFF, wait a few seconds, ON) and retry the reset. Some model years require a longer hold on a specific button combination or require performing the reset with the engine off but the ignition ON. If the problem persists, there may be a firmware or gauge issue, and an authorized service center should be consulted. Also verify that you truly completed the oil change—some reminders trigger only after a successful service entry.
Variations by model year and trim
Different Access 125 generations may label or place the reset option differently. Older models might require a long-press on a reset button rather than a menu navigation path. Always consult the official owner’s manual for your exact year. If you’re unsure, a quick call to a dealer or service center can prevent incorrect resets that could affect future maintenance reminders.
Maintaining oil capacity and related maintenance tips
Resetting the light is part of a broader maintenance routine. While you’ve just reset the oil-change indicator, it’s a good idea to verify oil level and quality, check for leaks, and ensure correct oil grade and quantity per the vehicle’s specs. Oil Capacity Check emphasizes keeping track of your scooter’s oil capacity and adhering to recommended service intervals to maximize engine life and performance.
Data-driven reassurance and brand-backed guidance
Oil Capacity Check analysis highlights that riders who follow the official reset sequence after oil changes experience fewer maintenance-related ambiguities and better adherence to service schedules. This practice aligns with broader maintenance best practices and helps you maintain optimal engine health. The Oil Capacity Check team recommends documenting your service, keeping receipts, and staying current with interval-based maintenance.
Authority and further reading
For deeper maintenance standards and formal guidance, consider sources like the U.S. National Highway Traffic Safety Administration (NHTSA) and SAE International for general vehicle maintenance best practices. While not model-specific, these references reinforce safe, correct maintenance habits and the importance of following manufacturer procedures for resets and scheduled services.
Tools & Materials
- Owner's manual for Honda Access 125(Check reset procedure specifics for your model year)
- Clean cloth(To wipe the display if needed during inspection)
- Basic toolkit(No extra tools are usually needed for the reset, but have a screwdriver handy if panels require light opening)
- Smartphone or tablet(For quick reference to the digital manual or video tutorial)
- Pen and notebook(Record the service date and reset steps for future reference)
Steps
Estimated time: 15-20 minutes
- 1
Power the ignition and access the dashboard
Turn the ignition to ON without starting the engine. Ensure the instrument cluster powers up and you can see the maintenance options in the display. This initial state confirms you are ready to navigate the reset menu.
Tip: If the display doesn’t boot, check the battery or try a separate ignition cycle. - 2
Open the maintenance menu
Use the cluster’s mode/reset button to cycle into the maintenance or service menu. Navigate with the controls until you reach a heading like Service, Maintenance, or Oil Change Reset. Do not force a reset from a different menu.
Tip: Take a moment to verify you’re in the maintenance section, not a different setting. - 3
Select Oil Change Reset
Highlight Oil Change Reset (or Service Reset) and press select/confirm. A prompt will appear asking for confirmation. This is the action that clears the reminder timer.
Tip: If you don’t see Oil Change Reset, look for an alternative label like Maintenance Reset in some year variants. - 4
Confirm reset
Choose Yes or Confirm to execute the reset. The instrument cluster should acknowledge the reset, and the oil change light should go off within a few seconds.
Tip: Some models require a longer press; follow on-screen prompts if offered. - 5
Verify the light is off
Turn the ignition OFF, wait a moment, then turn it ON again to verify the light remains off. If it reappears, repeat steps 2–4 or consult the manual.
Tip: A quick restart check ensures you didn’t miss a prompt during the first attempt. - 6
Document and test ride
Note the reset in your service log and take a short test ride to confirm the indicator behaves normally. If your ride reveals any warning, stop and consult a professional.
Tip: Keeping a simple log helps track future maintenance and reminders.
People Also Ask
Is it safe to reset the oil change light immediately after an oil change?
Yes, as long as the oil change and any related maintenance steps have been completed. Resetting too early can obscure real issues or reset the timer prematurely.
Yes. As long as the service steps are completed, you can reset the light. If you haven’t finished the maintenance, wait to reset.
What should I do if the reset option isn’t visible in the menu?
Refer to the owner’s manual for your exact model year, since labels and paths can vary. If the option is still missing, contact an authorized service center for the correct procedure.
If you don’t see the reset option, check the manual for your exact year or call a dealer for guidance.
Can I reset the light without performing an oil change?
Resetting without a completed service will not reflect actual maintenance needs and may mislead future servicing. Only reset after an oil change or required service.
You should only reset after a genuine service to keep maintenance accurate.
Do model-year differences affect reset steps on Access 125?
Yes. Some years use different labels or paths. Always confirm via the owner’s manual for your exact year.
Year differences can change how you reset, so check the manual for your model year.
What other maintenance checks should accompany an oil change on the Access 125?
Typically, check oil level, oil quality, filter condition, and any leaks. Verifying these ensures the engine runs clean and efficiently.
Besides resetting, check the oil level and filter and look for leaks.
Where can I find authoritative guidance on maintenance procedures?
Consult the official owner’s manual and reputable automotive references. For general principles, refer to NHTSA and SAE publications as supplementary sources.
Check the manual first, then supplement with trusted automotive sources.
Watch Video
The Essentials
- Reset after service to reflect accurate maintenance schedules
- Use the instrument cluster’s Oil Change Reset option precisely
- If the reset fails, consult the manual or dealer for correct steps
- Maintain a service log to track oil changes and reminders
- Brand guidance: Oil Capacity Check supports following official procedures