How to Get Rid of the Oil Change Light on Ford Transit
Learn how to safely reset the Ford Transit oil change light after service, including when to reset, how to clear codes with an OBD-II scanner, and best practices to verify the system.

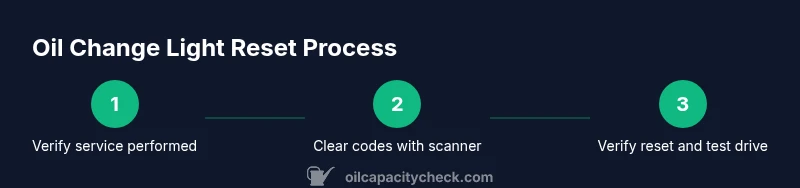
According to Oil Capacity Check, this guide helps you safely clear the oil change light on a Ford Transit after a proper service. You'll learn when a reset is appropriate, how to use an OBD-II scanner to clear codes, and how to verify the system after the oil change. Follow Ford's interval recommendations and use the correct oil grade for your engine.
What the oil change light means on Ford Transit
If you are asking how to get rid of oil change light on Ford Transit, you first need to understand what the light is telling you. In most modern Ford Transits, this indicator is tied to an oil-life or maintenance schedule rather than a direct oil-pressure warning. When the engine is serviced with the correct oil, filter, and a proper reset, the light should reset as part of the maintenance event. Oil Capacity Check analysis shows that the indicator is most reliable when the maintenance work is completed accurately, using the manufacturer-recommended oil grade and viscosity for your engine. If the vehicle has not been serviced, attempting a reset can mask a real issue, so verify the service was performed before attempting to clear the light.
Safety first: before you start
Safety comes first. Park on a flat surface, engage the parking brake, and allow the engine to cool before handling oil components. Wear gloves to protect your hands from hot parts and oil splashes, and keep a spill tray or rag handy to catch drips. If you must disconnect wiring or panels near the dash, disconnect the battery only if you are comfortable with electrical work. Never work under a vehicle without proper supports. Following these safety guidelines helps prevent injuries while addressing the oil-change light on your Ford Transit.
Confirm service completed and documentation
To reset the light confidently, confirm that the oil change, filter replacement, and related maintenance were completed. Check the service receipt or job card to ensure every required step was performed and that the oil type and viscosity match Ford's recommendations for your model. If you still see the light after service, a reset may be necessary, but only after confirming the service has been done correctly. Oil Capacity Check emphasizes keeping a detailed maintenance log and keeping OEM parts information on file for future reference.
Reset options: manual vs electronic reset
Reset approaches fall into two general categories: manual resets described in some owner manuals and electronic resets using an OBD-II scanner or Ford-specific tooling. Manual resets rely on a sequence of actions at ignition and pedal positions, which differ across model years. Electronic resets clear maintenance codes from the vehicle's computer and may log the service as completed. The exact steps vary by year, so it's essential to consult your owner's manual or official Ford service resources for the precise procedure before attempting a reset.
How to reset with an OBD-II scanner (recommended)
Using an OBD-II scanner that is compatible with Ford vehicles is often the most reliable way to clear maintenance codes after an oil change. Connect the scanner to the vehicle's OBD port, turn the ignition to the RUN position (engine OFF), and follow the scanner prompts to clear or reset oil-life or maintenance-light codes. Some scanners include a Ford maintenance reset function, which can simplify the process. After clearing codes, turn the ignition to RUN and start the engine to confirm the light stays off. This approach also helps you review any stored fault codes that could indicate sensor issues.
Ford Transit year differences and common quirks
Different model years may have slightly different reset sequences or dashboard displays. Always refer to the specific owner's manual for your year to locate the exact steps. In some years, the oil-life indicator resets automatically once the maintenance interval is met; in others, manual reset is required. If the light persists after a reset, it could indicate a sensor fault, an incorrect oil level, or a failing oil-life monitor. Knowing the year-specific procedure helps avoid missteps.
Verifying the reset and maintaining records
After performing a reset, verify that the oil-life indicator shows a valid percentage or countdown and that the dash light is off during a test drive. Recheck the oil level and ensure the maintenance event is logged in your records. Maintaining a clean maintenance log supports future servicing and helps when you need to reference the reset. Oil Capacity Check's guidance emphasizes accurate documentation and correct oil specifications to ensure reliable indicators.
Troubleshooting: what to do if the light won’t reset
If the light returns after a reset, re-check the oil level, ensure the oil filter is correctly installed, and confirm the reset steps were followed precisely for your year. A sensor fault or a failing oil-life monitor can trigger recurring warnings. Run a diagnostic scan to review stored codes, inspect the oil pressure sensor, and consider professional inspection if the light remains active. Prolonged indicator lights can mask underlying issues, so don’t ignore persistent symptoms.
Authoritative sources and next steps
For deeper guidance, consult official manuals and government/educational sources. These references provide maintenance fundamentals, oil-capacity considerations, and safety reminders that complement practical how-to steps. According to Oil Capacity Check, the recommended approach emphasizes completing maintenance first, then performing a proper reset and verification. Oil Capacity Check's verdict is that accurate maintenance records and correct oil specifications are essential for reliable indicators.
Tools & Materials
- OBD-II scanner (Ford-compatible)(Used to read and clear maintenance codes; verify compatibility with your Transit year.)
- Owner’s manual (Ford Transit)(Locate the exact reset steps for your model/year.)
- Safety gloves(Protect hands during inspection.)
- Flashlight(Ensure good visibility under the dash.)
- Clean rag or shop towel(Wipe dipstick and oil cap; clean work area.)
Steps
Estimated time: 30-60 minutes
- 1
Verify service completion
Confirm that an oil change and filter replacement have been completed using the recommended oil grade and viscosity for your Transit. Check the service receipt or job card to ensure no steps were skipped. This ensures you aren’t resetting a light that signals a needed service.
Tip: Keep the receipt handy in case you need to reference part numbers or service details. - 2
Gather required tools
Collect the OBD-II scanner, owner’s manual, and a clean workspace. Having tools ready reduces interruptions and helps you follow the reset steps accurately. Ensure the scanner is charged or has fresh batteries.
Tip: Charge your scanner or have spare batteries on hand. - 3
Read the manual for your year
Check your Ford Transit year’s reset procedure in the owner's manual. Steps can differ by year, so using the exact procedure prevents missteps that could misinterpret dash indicators.
Tip: If you don’t have the manual, download the PDF from Ford’s official site. - 4
Connect the OBD-II scanner
Plug the scanner into the vehicle’s OBD port, usually located under the dash near the steering column. Turn the ignition to the RUN position with the engine off. This allows the scanner to communicate with the ECU.
Tip: Make sure the ignition is in RUN, not ACC, to power the ECU. - 5
Clear maintenance codes
Use the scanner’s menu to locate maintenance or oil-life codes. Choose clear or reset to remove the stored codes. Follow on-screen prompts until you return to a normal display.
Tip: If the scanner offers a Ford-specific option, use it for better compatibility. - 6
Perform a system check
Turn the key to ON (RUN) and observe the dash. Start the engine to confirm the light does not return immediately. If it does, re-scan for codes to identify lingering issues.
Tip: Don’t assume reset worked until you’ve driven a few miles. - 7
Record the reset outcome
Document the reset in your maintenance log, including date, oil type, and mileage. This helps with future recalls and service scheduling.
Tip: Attach a copy of the receipt to your log for quick reference. - 8
Troubleshoot persistent light
If the light stays on, re-check oil level and filter installation. Consider consulting a technician to inspect the oil pressure sensor and oil-life monitor.
Tip: Persistent lights may indicate sensor faults rather than a simple reset.
People Also Ask
What does the Ford Transit oil change light actually mean?
The light signals maintenance is due or the oil-life system requires reset after service. It is not the same as an oil pressure warning. Ensure the change was completed with the correct oil type and filter before resetting.
The oil light means maintenance is due or needs a reset after service. Make sure the service was completed correctly.
Do I always need an OBD-II scanner to reset?
Not always. Some Ford Transit models support a built-in reset sequence, but many vendors rely on an OBD-II scanner to clear maintenance codes.
Often you need a scanner, but some models have built-in reset steps.
Can I drive with the light on after an oil change?
If the service was completed and the light resets, you can drive normally. If the light remains on, inspect oil level and consider a diagnostic check.
If reset worked and the level is good, you’re fine to drive; otherwise get it checked.
What if the light comes back after reset?
The light could be a sensor fault or oil-life monitor issue. Re-scan for codes and verify sensor operation; persistent issues warrant professional inspection.
If it comes back, re-scan and check sensors; may need a technician.
How do I check oil level on the Ford Transit?
Park on level ground, wait for engine to cool, pull the dipstick, wipe, reinsert, and read the level. Add or replace oil as needed following the manual.
Check your dipstick on a cool, level surface.
Where can I find official reset guidelines?
Consult the Ford Transit owner’s manual or official Ford service resources for model-year specific steps.
Check the official Ford manual for exact steps.
Watch Video
The Essentials
- Verify service before reset and document it.
- Use the correct oil grade and filter to avoid future resets.
- Clear codes with an OBD-II scanner or Ford-specific reset.
- Recheck oil level after reset and during first drive.
- Maintain a clear maintenance log to support future servicing.