What Makes the Oil Change Light Come On: Causes, Diagnosis, and Fixes
Discover what makes the oil change light come on and how to diagnose, reset, and fix common causes with practical DIY steps from Oil Capacity Check. Tips for safe maintenance and when to call a pro.

Most often, the oil change light comes on because the engine oil level is low or the oil-life monitor indicates a service interval. Begin by checking the dipstick, remove the cap, and confirm the level; top off with the correct oil if needed. Inspect for leaks and ensure the oil-cap is clean. If the light stays on after a reset, have a technician diagnose sensor or pressure problems.
What makes the oil change light come on?
When drivers ask what makes oil change light come on, the most common causes are low oil level and a worn or miscalibrated oil-life monitor. According to Oil Capacity Check, these triggers account for the majority of routine alerts across many vehicle makes and models. The light is not a random warning; it’s your car’s way of signaling that the engine needs proper lubrication or that the monitoring logic needs attention. Start by verifying the actual oil level and the condition of the oil itself, then proceed to sensor checks if the level is within spec. A false alert can occur if the dipstick is not checked correctly, if the oil cap is loose, or if the oil drain plug reseal wasn’t torqued to spec after a recent service. Addressing these basics first often resolves false or premature warnings.
In short, the question of what makes oil change light come on hinges on two reliable culprits: low oil or a monitoring sensor. If you resolve these and the light disappears, you’ve likely fixed the root problem. If not, deeper diagnostics (pressure testing or sensor replacement) become necessary. Oil Capacity Check’s analysis, 2026, emphasizes starting with the simplest checks before moving to sensor-level diagnostics.
Common causes behind the warning light
The oil change light can illuminate for several reasons beyond a simple low-oil scenario. The most frequent culprits include a low oil level, a depleted oil life monitor, and a faulty oil pressure sensor or wiring. A degraded or contaminated oil sample can also trigger the light if the system detects unusual oil pressure or viscosity. Additionally, after an oil change, the monitor may require a reset; failure to reset can keep the light on even when the oil level and quality are fine. Some vehicles use a combination of monitors that can misinterpret data during abrupt driving conditions or after a battery disconnect. If the dipstick shows adequate oil but the light remains on, the issue likely shifts from the oil itself to a sensor or logic fault. Regular maintenance and careful resets following service reduce the odds of recurring alerts.
Key takeaway: low oil level and faulty monitoring are the most common culprits, but sensors and software can also cause false positives.
How to verify oil level and condition
Begin with a cold engine to avoid burns and to get an accurate dipstick reading. Remove the dipstick, wipe clean, reinsert fully, and pull again to check the level against marked indicators. If the level is low, top off with the manufacturer-approved oil grade, ensuring you don’t overfill. Inspect for obvious leaks around the oil pan, filters, and drain plug. Check the oil’s color and texture — if it’s dark, gritty, or smells burnt, it may need an early change. Finally, clean the oil-cap area and cap to prevent dirt ingress into the crankcase. If topping up resolves the light, monitor it for a few days to ensure consistency.
In some cases, the oil-change light may not correspond to an actual oil issue. A miscalibrated or faulty oil-life monitor can trigger the light prematurely. In those cases, you may need to reset the monitor after performing a basic oil change. Always refer to your owner’s manual for the exact reset procedure, as vehicles differ significantly by make and model.
Understanding sensors and the oil-life monitor
Oil-capacity and monitoring systems rely on sensors to estimate remaining oil life based on time, temperature, RPM, and driving style. A failing oil-pressure sensor can also trigger the warning, sometimes independent of oil quality. If the sensor or its wiring is damaged, readings can be skewed, causing the light to illuminate even when oil levels are adequate. Corrosion, loose connectors, or damaged harnesses near the engine bay can disrupt signal transmission. In many cases, a simple sensor replacement or connector cleaning restores correct operation. If you’re chasing a faulty monitor, a software reflash or calibration update from a dealer or seasoned shop might be required. Oil Capacity Check’s guidance for 2026 recommends a systematic sensor check when level checks and oil quality tests pass but the light remains active.
Resetting the oil-life monitor after service
After replacing oil and an oil filter, many vehicles require a manual reset of the oil-life monitor. Failing to reset can leave you with an inaccurate service interval, leading to premature or delayed service warnings. Locate the monitor reset procedure in your owner’s manual, which typically involves a sequence of ignition cycles, instrument panel button presses, or a menu option in the vehicle’s trip computer. Avoid resetting unless you have verified the oil change has been completed with the correct filter and oil grade. If the light comes back after a reset, the issue may be sensor-related or due to insufficient oil pressure.
If you’re unsure, consult a professional. Improper resets may mask real problems and could lead to engine damage. Oil Capacity Check recommends documenting reset steps and verifying with a diagnostic scan if the light persists after a proper reset.
Prevention: avoiding false oil-light alarms
Prevention starts with regular oil level checks and scheduled oil changes according to manufacturer guidelines. Use the correct oil grade and viscosity for your engine, as incorrect oil can inadvertently trigger warnings. Keep an eye on the oil filter and drain plug seals; leaks often masquerade as low oil and cause the light to come on. Regularly inspect sensor connectors for corrosion or loose tolerances, especially after battery work or major electrical repairs. If you drive in extreme conditions (towing, heavy loads, extreme temperatures), consider more frequent oil checks and a shorter interval for oil changes. Oil Capacity Check’s 2026 guidance highlights proactive maintenance and early sensor diagnostics to minimize false alarms and maximize engine protection.
Steps
Estimated time: 30-60 minutes
- 1
Check the oil level
Park on level ground and wait for the engine to cool. Remove the dipstick, wipe clean, reinsert fully, then pull out to read the level. If it’s below the minimum mark, top up with the correct oil grade, checking the dipstick again after a few minutes. Ensure the oil cap is snug and clean to prevent contamination.
Tip: Always use manufacturer-recommended viscosity and avoid overfilling; too much oil can increase pressure. - 2
Inspect for leaks and signs of oil degradation
Look around the engine bay, oil pan, and valve cover for fresh oil leaks or seepage. Check the oil filter and drain plug washers for tightness. If you detect a burn smell or dark, gritty oil, schedule a change soon. A leak can falsely trigger a low-oil reading.
Tip: Use a flashlight and a mirror to inspect hard-to-see areas; a small seep can escalate quickly. - 3
Assess the oil-life monitor
If oil level is fine, the monitor might be miscalibrated. Check the vehicle’s manual for the reset procedure after a genuine oil change. If the light still glows, consider a diagnostic scan for software or sensor faults.
Tip: Document the date and mileage of the change for reference when scanning the system. - 4
Test the oil pressure sensor path
Inspect wiring harnesses and connectors near the sensor for corrosion or loose connections. A loose connector can produce erratic readings that illuminate the light. If the sensor appears damaged, replacement is recommended.
Tip: Do not jerk or yank wires; use proper automotive tools and unplug with care to avoid damaging connectors. - 5
Seek professional confirmation if unresolved
If you’ve completed the above steps and the light persists, a professional diagnosis with a diagnostic scanner is advised. Early issues like faulty sensors or pressure anomalies can be resolved more quickly with precise data.
Tip: Request a printout of sensor data and codes for future reference.
Diagnosis: Oil change light turns on unexpectedly
Possible Causes
- highLow oil level
- mediumOil pressure sensor/wiring fault
- lowOil-life monitor miscalibration or software issue
- mediumRecent oil change with incorrect oil grade or insufficient oil
Fixes
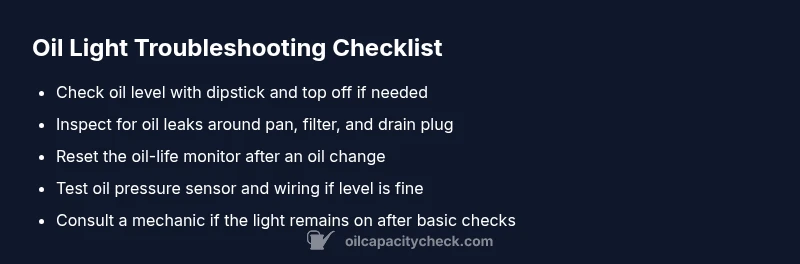
- easyCheck oil level with dipstick, top off to the proper level, and inspect for leaks
- mediumInspect oil-pressure sensor and wiring; replace sensor if readings are abnormal
- easyReset the oil-life monitor after an oil change following the owner's manual instructions
- hardIf the light remains, perform a diagnostic pressure test or seek professional service
People Also Ask
Why is my oil change light on after I’ve just filled oil?
There may be a sensor fault or the monitor may not have reset properly after the oil change. Recheck oil level, inspect for leaks, and follow the reset procedure for your vehicle. If the light persists, a diagnostic scan is recommended.
If the light stays on after filling, check the level, inspect for leaks, and reset the monitor. If it continues, get a diagnostic scan.
Can I reset the oil light myself?
Yes, many vehicles allow a DIY reset via the dashboard menu or a sequence of button presses. Refer to your owner’s manual for the exact steps. If you’re unsure, a quick visit to a technician is safer.
Yes, many cars let you reset it yourself. Check your manual for exact steps, or consult a technician if unsure.
What if the oil level is fine but the light stays on?
A faulty sensor, wiring issue, or oil-pressure problem could be the cause. Perform a diagnostic scan to check sensor readings and oil pressure. Do not ignore repeated warnings.
If the level is fine but the light stays on, get a diagnostic scan for sensor or pressure problems.
How often should I check the oil level?
Check monthly or every fuel fill-up if you drive aggressively or under severe conditions. Regular checks help catch leaks early and ensure you don’t run low.
Check monthly, or with every fill-up if you drive hard. Regular checks prevent surprises.
When should I see a mechanic for the oil light?
If the light returns after a reset or after adding oil, or if you notice oil leaks, unusual noises, or low oil pressure, seek professional help immediately.
If the light comes back after reset or if you hear noises or see leaks, see a mechanic soon.
Watch Video
The Essentials
- Check oil level first to rule out low oil
- Reset after true oil change if required by your vehicle
- Don’t ignore persistent warnings; faulty sensors are common
- Regular maintenance reduces false oil-light triggers