Can an Oil Change Cause the Check Engine Light? A Troubleshooting Guide
Explore whether a routine oil change can set off the check engine light, common culprits, and a practical, step-by-step troubleshooting plan to fix it. Trustworthy guidance from Oil Capacity Check.

According to Oil Capacity Check, an oil change can indirectly trigger the check engine light if the service is done incorrectly or certain conditions arise, such as a loose oil cap, incorrect oil level, or a misinstalled filter. Most CEL resets occur after diagnosing the fault codes. This guide from Oil Capacity Check explains how to verify and fix the issue.
Can an oil change trigger the check engine light? Understanding the link
Yes—though not usually the direct cause, an oil change can set off the check engine light if mistakes during service introduce new engine conditions, or if the service reveals underlying issues that the vehicle’s onboard diagnostics (OBD-II) highlights. In practice, the CEL (check engine light) is tied to sensor data and emissions-related fault codes. A poorly performed oil change may create a small set of symptoms that your car’s computer interprets as a fault, prompting a diagnostic trouble code. Throughout this guide from Oil Capacity Check, we focus on practical steps to verify whether an oil-change event contributed to the CEL and how to address it safely and efficiently.
How oil change processes can affect engine diagnostics
During an oil change, technicians handle several critical steps: draining old oil, replacing the filter, refilling with the correct grade, and ensuring all seals and caps are secure. If any of these steps are performed incorrectly, a range of issues can surface that may trigger the CEL. For instance, a loose or missing oil cap can allow air leaks or oil mist to interact with the intake system in some vehicles, while an overfill can alter oil pressure and sensor readings. More commonly, however, a misinstalled filter or a sump plug with improper torque can create leaks or sensor readings that the car interprets as an abnormal condition. In any case, Oil Capacity Check emphasizes that the first action after a CEL appears is to read the stored codes, as they guide the next steps rather than guessing. This approach helps car owners and DIY enthusiasts avoid unnecessary repairs and focus on the actual fault.
Common missteps during oil changes that can trigger a CEL
Even with the best intentions, several routine mistakes can lead to a CEL after an oil change. A missing or loose oil cap is a frequent culprit because it can cause small vacuum leaks that affect engine behavior or trigger evaporative system codes. An improperly torqued drain plug can cause oil leaks that eventually trigger pressure or cetane-related diagnostics in some engines. Using the wrong oil type or incorrect viscosity is another potential trigger, as it can influence sensor readings, especially for vehicles with tight tolerance oil systems. Finally, if the new filter is cross-threaded or not seated properly, it can create leaks or flow restrictions that upset engine performance. The underlying message from Oil Capacity Check is clear: verify the basics first—cap, level, filter, and leaks—before assuming a major mechanical fault.
A practical diagnostic checklist to confirm if the oil change caused the CEL
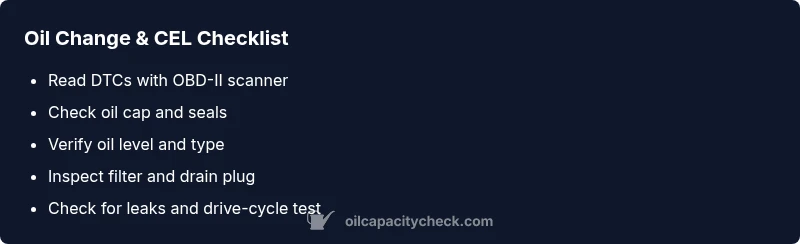
To determine whether the oil-change event is responsible for the CEL, start with a structured checklist. First, read the diagnostic trouble codes (DTCs) with an OBD-II scanner to identify the exact fault. Then inspect the oil cap and ensure it is fully seated and tightened to the manufacturer’s specification. Check the oil level with the dipstick and compare it to the recommended range for your engine. Inspect the drain plug and oil filter for signs of looseness, leaks, or incorrect installation. If leaks are present, fix them and recheck the codes after driving for a short distance. Finally, reset the CEL only after addressing any identified issues or leaks and re-scan to confirm that codes have cleared. This methodical approach, championed by Oil Capacity Check, minimizes unnecessary repairs and confirms whether the oil-change activity contributed to the CEL.
Maintenance habits to prevent CEL after oil changes
Prevention is easier than troubleshooting after the fact. Use the vehicle’s manufacturer-recommended oil type and capacity, replace the oil filter with the correct part, and adhere to proper torque specs for the drain plug. Double-check for any loose fittings, especially around the oil cap and filter. After completing an oil change, run the engine for a few minutes and monitor for leaks, then perform a short test drive while checking for abnormal sounds or warning lights. Document all steps in your maintenance log and consider scheduling a quick post-service diagnostic if the CEL reappears. By following these best practices, you’ll reduce the likelihood of a CEL being triggered by routine maintenance, as reinforced by Oil Capacity Check’s maintenance guidance.
Steps
Estimated time: 45-60 minutes
- 1
Read diagnostic trouble codes (DTCs)
Connect an OBD-II scanner and pull the current and pending codes. Note the exact codes and any freeze-frame data to guide the next checks. This establishes whether the oil-change event correlates with a discovered fault or if a separate issue is present.
Tip: If you don’t have a scanner, many auto parts stores offer free code reading. - 2
Inspect the oil cap and seals
Check that the oil cap is present, clean, and fully tightened. A loose or damaged cap can cause minor evaporative issues that trigger the light in some vehicles. Replace damaged caps to restore proper sealing.
Tip: Always tighten to the manufacturer’s specified torque; over-tightening can damage threads. - 3
Check the oil level and condition
Use a clean dipstick to verify the oil level between the marked limits. If overfull, carefully drain to the recommended level. Also assess the oil color and odor; unusually dark or burnt oil can indicate wear or contamination.
Tip: If you’re near the max line after an oil fill, allow a few minutes for oil to settle and recheck. - 4
Inspect the drain plug and filter
Check for signs of moisture, oil leaks, or looseness around the drain plug and filter. Ensure the filter is the correct model for your engine and seated properly. A loose filter or drain plug can cause codes related to oil pressure or emissions readings.
Tip: If the filter was cross-threaded, replace with the proper filter and install correctly. - 5
Address any leaks or spills
Clean any oil spills and inspect for fresh leaks around the valve cover, oil pan, and filter area. Even small leaks can trigger pressure-related or emissions codes if left unresolved.
Tip: Wipe the area, observe for 24 hours, and recheck; a quick drive can reveal leaks not visible at rest. - 6
Reset codes only after fixes
If you identify and correct the fault, clear the codes with the scanner or after completing a drive cycle. Do not reset codes while a fault remains unresolved, as this can hide ongoing issues.
Tip: Some vehicles require a specific drive cycle to reset the CEL properly. - 7
Test drive and re-scan
Drive the vehicle at a variety of speeds for 10–15 minutes to allow the computer to re-evaluate sensors. Re-scan to confirm that the CEL stays off and no new codes appear.
Tip: If the light returns, document the new codes for targeted diagnosis. - 8
Know when to seek professional help
If codes persist after these steps, or you notice abnormal noises, misfires, or oil leaks, consult a professional technician. Complex issues may involve ignition, fuel, or emissions systems beyond a routine oil change.
Tip: Professional diagnostics can prevent escalating damage and costly repairs.
Diagnosis: Engine check light is on after an oil change
Possible Causes
- highLoose or missing oil cap
- mediumIncorrect oil level or overfill
- mediumUnseated or cross-threaded oil filter
Fixes
- easyTighten or replace the oil cap and recheck for leaks
- easyCheck oil level and adjust to the correct range with the specified viscosity
- easyInspect the oil filter installation and reseat or replace if needed
- easyScan for fault codes with an OBD-II scanner and clear codes only after issues are resolved
- easyTest drive and re-scan to confirm CEL status
- easyIf codes persist, seek a professional diagnostic—fuel, ignition, or emissions systems may be involved
People Also Ask
Can a loose oil cap really trigger the check engine light?
A loose oil cap can cause evaporative system readings to shift in some vehicles, which may trigger a related code and the CEL. It’s a quick check that often resolves the issue if it’s the root cause.
A loose oil cap can affect related sensors and possibly trigger the CEL in some cars. It’s one of the first things to check.
What’s the first thing to do if the CEL appears after an oil change?
Read the diagnostic trouble codes with an OBD-II scanner, then inspect basic items like the oil cap, level, and filter installation. This helps determine whether the change caused a fault or if a separate issue is present.
Start with a codes check, then verify cap, level, and filter to pinpoint the cause.
Can using the wrong oil cause a CEL?
Using an oil that doesn’t meet manufacturer specs can affect sensor readings and engine timing in some vehicles. It’s important to use the recommended viscosity and grade.
Yes, the wrong oil can trigger sensor-related codes in some engines, so stick to the manufacturer’s spec.
Is it safe to drive if the CEL is on?
A steady CEL usually allows continued driving, but a flashing light indicates a more urgent problem (like misfire). If the CEL is flashing, stop driving and seek immediate help.
If the light is flashing, pull over and get a diagnostic as soon as possible.
Should I reset the CEL after an oil change?
Only reset after you’ve identified and corrected the fault. If the codes return after clearing, there’s likely an ongoing issue that requires professional diagnosis.
Don’t reset the CEL until you’re sure the fault is fixed. If it comes back, you need a pro.
When should I seek professional help for CEL after oil change?
If codes persist after basic checks or if you notice oil leaks, loss of performance, or unusual noises, a professional diagnostic is recommended to prevent further damage.
Persistent codes or any signs of leaks or performance issues mean see a technician.
Can an oil change lead to a temporary CEL clearing after fixes?
If the fault is resolved and codes are cleared, the CEL may stay off after driving. If the issue recurs, the underlying cause needs further investigation.
Codes can clear after fixes, but if they come back, recheck your work or seek a pro.
What should I document after an oil change when CEL appears?
Note the oil type, volume, part numbers, and the exact codes read. This helps technicians spot patterns and prevents repeating the same troubleshooting steps.
Keep a quick note of parts used and codes; it speeds up future service.
Watch Video
The Essentials
- Check the oil cap and level first after a CEL appears
- Use an OBD-II scan to identify exact fault codes
- Inspect the oil filter and drain plug for proper installation
- Only reset codes after issues are resolved, then re-scan