How to Check Oil Level in Bike: A Practical Guide
Learn how to check oil level in bike with a practical, step-by-step approach. This guide covers tools, safety, dipstick reading, common pitfalls, and maintenance tips to keep your engine healthy.

Learn how to check the oil level in your bike with a simple, safe routine. This guide covers when to check, what tools you need, and how to top up correctly to protect your engine. Whether you ride a cruiser, sportbike, or dirt bike, maintaining correct oil level helps reduce friction, heat, and wear.
Why Checking Oil Level on a Bike Matters
Oil is the lifeblood of your motorcycle’s engine. It lubricates moving parts, cools hot surfaces, and helps seal gaps that prevent metal-to-metal contact. Running with too little oil or with contaminated oil can lead to accelerated wear, reduced efficiency, and even catastrophic engine failure. Knowing how to check oil level in bike scenarios empowers you to catch leaks, monitor oil health, and plan maintenance before problems appear. According to Oil Capacity Check, regular oil level checks are a practical way to extend engine life and avoid unexpected breakdowns. In this guide, you’ll learn why it matters, how to perform a safe read, and how to interpret the results for different bike types and oil systems. The goal is a consistent, repeatable process you can lean on during every ride.
A reliable oil check is not a one-off task. It’s part of your bike’s maintenance rhythm. By building a routine, you’ll notice changes in oil color, viscosity, or level that signal when a top-up or service is due. The oil level is not just a number on a dipstick; it’s a quick health indicator for seals, gaskets, and the overall lubrication system. With the right approach, you’ll keep your engine happier, cooler, and more efficient over time.
If you’re new to bikes, start by reading your owner’s manual for model-specific guidelines. The exact dipstick location, acceptable oil grades, and the specified oil capacity all vary by design. The more you know about your bike’s oil system, the more confident you’ll be when checking the level. This article uses practical steps, safe practices, and real-world tips to walk you through the process, so you can perform a precise check every time.
wordCount_in_block_1_manual_estimate_only_not_required_for遵守
Tools & Materials
- Owner’s manual(Model-specific oil capacity and dipstick location)
- Clean lint-free rag(Wipe dipstick and catch drips)
- Engine oil (as specified for your bike)(Choose correct grade and quantity for topping up)
- Gloves(Keeps hands clean and safe)
- Flashlight(Better visibility under the bike)
- Catch tray or old rag(Prevent spills on the ground)
Steps
Estimated time: 10-15 minutes
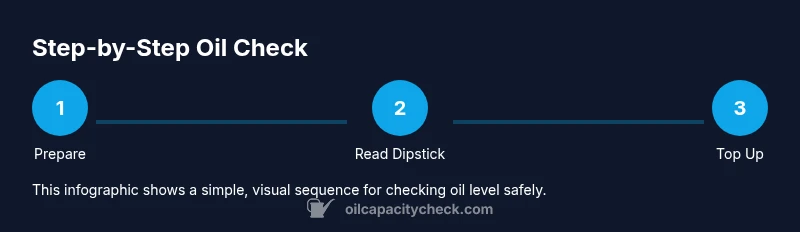
- 1
Prepare the bike and workspace
Park on level ground and turn off the engine. Allow the engine to cool for several minutes so the oil level settles and the dipstick is readable. Wipe the dipstick area clean and remove the fill cap if applicable, so you can access the dipstick without spillage.
Tip: Working on a cool engine reduces the risk of burns and ensures an accurate reading. - 2
Locate the dipstick and fill cap
Identify the dipstick or sight glass according to the owner’s manual. Some bikes use a dipstick integrated into the oil fill cap; others have a separate level sight window. Have your rag ready to manage drips once you remove the cap.
Tip: If you’re unsure about dipstick location, double-check the manual or look for a clearly marked cap on the engine case. - 3
Wipe and reinsert the dipstick
Wipe the dipstick clean with your rag, then fully reinsert it into the tube or fill plug. Remove it again to read the oil level. A clean reading avoids misinterpretation caused by residual oil.
Tip: Insert the dipstick until it seats; partial insertion can give a false high or low reading. - 4
Read the level and compare to marks
Check where the oil line sits relative to the Min and Max marks on the dipstick or sight glass. Oil should generally fall between these marks. If it’s below the minimum, you’ll need a topping-up; if it’s above the maximum, you’ve overfilled and should correct gently.
Tip: Always compare to the marks, not the cap’s color or the oil’s color alone. - 5
Top up if needed
If the level is low, add small amounts of the recommended oil grade in increments (about 0.2–0.5 liters, depending on your bike). Recheck after a few minutes of settling so the oil can properly distribute.
Tip: Add a little at a time; overfilling is a common mistake and harder to fix than a small top-up. - 6
Close up and cleanup
Reinstall the dipstick and fill cap, wipe any spills, and replace the oil cap. Record the date and mileage of the check in your maintenance log to track oil levels over time.
Tip: Keep a simple log; it helps you spot trends like rising oil consumption or leaks.
People Also Ask
When should I check the oil level on my bike?
Check with the engine cool on level ground, and follow the manufacturer’s interval guidelines. Regular checks can reveal leaks or consumption trends early.
Check the oil level when the engine is cool and the bike is on level ground; this helps you spot leaks and consumption trends early.
Can I check the oil level when the engine is hot?
Reading oil level while hot can give an inaccurate reading due to thermal expansion. Allow the engine to cool before checking.
It’s best to wait for the engine to cool before checking the oil level to ensure an accurate reading.
What if the oil level is below the minimum mark?
Do not ride long with low oil. Top up with the correct oil grade in small increments and recheck. If low persists, there may be a leak or consumption issue.
If it’s below the minimum, top up carefully with the right oil grade and recheck; persistent low levels may indicate a leak.
How often should I check the oil level?
Check monthly or every 500–1000 miles, depending on riding conditions and climate. Adjust frequency if you notice consumption or leaks.
Check oil regularly—monthly or with each long ride, depending on your climate and usage.
What should I do if I can’t find the dipstick?
Consult the owner’s manual or a dealer. Some bikes use a sight glass instead of a dipstick; never guess the level by sight alone.
If there’s no dipstick, refer to the manual and use the provided sight glass; never guess the level.
Watch Video
The Essentials
- Check on level ground with a cool engine.
- Read between Min and Max marks for accuracy.
- Top up slowly and recheck after settling time.
- Maintain a log of checks for trends.