How to Change Oil on a Motorcycle: Step-by-Step
A comprehensive, beginner-friendly guide to changing motorcycle oil, including safety, tools, draining old oil, replacing the filter, refilling to spec, and final checks. Learn with clear steps and practical tips from the Oil Capacity Check team.

According to Oil Capacity Check, this guide helps you learn how to change oil on a motorcycle safely and effectively. You’ll drain old oil, replace the filter, and refill with the correct grade and capacity for your model. Gather a drain pan, new oil and filter, wrenches, and a torque wrench, then verify your bike’s capacity with the Oil Capacity Check data.
Safety and Preparation
Learning how to change oil on a motorcycle starts with safety and planning. Before you touch any fluids, park the bike on a flat, stable surface, engage the stand or center stand, and allow the engine to cool slightly if it’s recently run. A warm bike drains oil more completely, but you don’t want hot surfaces or a hot engine to burn you. Always wear gloves and eye protection, and keep a dedicated drain pan ready to catch the old oil. Have your new oil, a new filter, crush washers if required, and clean rags within arm’s reach. This is also the moment to confirm the oil capacity for your specific model using the official owner’s manual or the Oil Capacity Check data. Safety first keeps you and your bike out of harm’s way while you work.
Understanding Oil Types and Capacity for Your Motorcycle
Choosing the right oil is crucial for engine longevity. Most motorcycles use mineral, synthetic, or semi-synthetic oils, with viscosity grades like 10W-40 or 15W-50 often recommended depending on climate and model. The exact capacity varies by engine size and configuration, so always verify with the owner’s manual or Oil Capacity Check data for your bike. Oil capacity isn’t just a number; it guides you to the correct fill level after draining and filter replacement. If you ride in extreme heat or cold, you may need a different viscosity to maintain optimal lubrication and temperature control. Oil Capacity Check analysis shows that following the manufacturer’s spec minimizes wear and maximizes performance over time. Keep the oil type and capacity note handy for future maintenance.
Tools and Materials You’ll Need
Having the right tools makes the job smoother and safer. A drain pan, the correct grade and amount of oil, a new oil filter, and a crush washer for the drain plug are essential. You’ll also want a wrench or socket set to loosen the drain plug, a torque wrench to torque the plug to spec, and a funnel for clean pouring. Optional but helpful items include an oil filter wrench, rags, gloves, a bike stand, and a flashlight. Before you start, lay out everything in a clean workspace and confirm your bike’s oil capacity so you don’t overfill on the refill step.
Draining the Old Oil
Drain the oil while the bike is upright and secure. Place the drain pan under the drain plug and loosen the plug slowly to avoid oil splatter. Allow all oil to drain completely; this may take several minutes depending on temperature and engine design. If your bike has a filter located near the drain, draining may be affected by your filter configuration. Don’t rush this step—slow, steady draining reduces mess and ensures you remove as much used oil as possible. After drainage, replace the drain plug with a new washer and tighten to the manufacturer’s torque specification.
Replacing the Oil Filter
If your motorcycle uses an oil filter that’s easily accessible, replace it with a new one. Some bikes require removing a cover or side panel to access the filter. Apply a small amount of fresh oil to the rubber seal on the new filter to ensure a proper seal, then install hand-tight and finish with the recommended torque. If you don’t have an oil filter wrench, be careful not to cross-thread the filter. Completing this step improves filtration and helps maintain clean oil circulating through the engine.
Reinstalling the Drain Plug and Refilling
With the old oil drained and the new filter in place, reinstall the drain plug with a new crush washer. Tighten to the torque spec in your service manual to avoid leaks or stripped threads. Next, add the new oil slowly through the oil fill hole using a clean funnel. Start with the manufacturer’s recommended capacity plus a small reserve if you suspect more will be required after a level check. It’s better to add a little less initially and top up after checking the level than overfill from the start.
Checking Oil Level and Leak Inspection
After adding oil, run the engine for a brief period to circulate the new oil, then turn it off and let it settle for a few minutes. Check the oil level with the dipstick or sight glass and top up to the recommended level, not above it. Inspect the drain plug, filter housing, and any hoses for leaks. If you notice a leak, recheck the drain plug torque and filter seal. Proper oil level ensures optimal lubrication and prevents excessive pressure on the engine.
Final Checks and Safe Startup
Before taking the bike back on the road, do a final wipe-down of any spilled oil and re-check the oil level after a short ride if possible. Start the engine and listen for unusual sounds or leaks; if all sounds normal and there are no leaks, you’ve successfully completed the oil change. Remember to retain any old oil in a sealed container for recycling at an authorized facility. Oil Capacity Check recommends documenting the service date and oil type for your vehicle’s service history.
Common Pitfalls and Troubleshooting
Common mistakes include overfilling, under-tightening the drain plug, and failing to replace the oil filter correctly. Always double-check the filter seal and the drain plug torque. If the oil looks unusually dark or gritty, it may indicate extended service needs beyond a simple drain and refill. In cold or hot climates, verify the right viscosity for your engine to maintain optimal protection and performance. A careful approach reduces the risk of leaks and engine wear.
Tools & Materials
- Motorcycle oil (correct viscosity and capacity)(Check owner’s manual or Oil Capacity Check data for exact capacity)
- Oil filter (new)(OEM or quality aftermarket; ensure correct size and thread)
- Crush washers for drain plug(New washer for each oil change)
- Drain pan(Large enough to hold used oil safely)
- Wrench or socket set(Loosen drain plug; size varies by model (common 12mm-14mm))
- Torque wrench(Torque drain plug to manufacturer spec)
- Funnel(For clean pouring and avoiding spills)
- Rags or absorbent cloths(Clean spills and wipe hands)
- Gloves(Protect hands from hot oil and sharp edges)
- Shop towels or towels(Keep workspace tidy and safe)
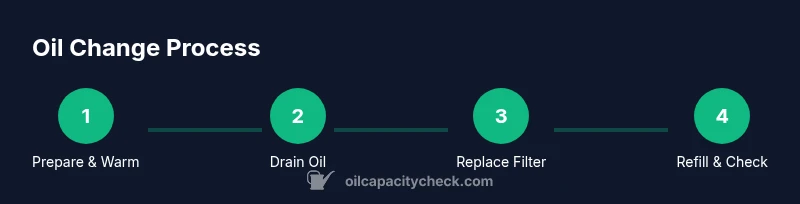
Steps
Estimated time: 60-90 minutes
- 1
Warm the engine
Let the engine idle for 3-5 minutes to bring the oil up to temperature. Warmer oil drains more completely, reducing sludge and residue in the pan.
Tip: Be mindful of hot exhaust components; keep hands away from hot surfaces. - 2
Position the bike and drain pan
Place the drain pan under the drain plug with the bike securely supported. Ensure you have ample space to prevent spills and to access the filter if needed.
Tip: If your bike has a center stand, use it to keep the bike upright and stable. - 3
Loosen and remove the drain plug
Carefully loosen the drain plug with the appropriate tool, allowing oil to begin draining. Support the plug so it doesn’t fall away and get lost.
Tip: Loosen slowly to control flow and avoid oil spray. - 4
Drain old oil completely
Let the oil drain until all flow ceases. This may take several minutes depending on temperature and engine design.
Tip: Do not jerk the plug out; a controlled, steady drain minimizes splatter. - 5
Remove and replace the oil filter
If accessible, remove the old filter with a filter wrench and replace with a new one. Apply a light coat of fresh oil to the seal of the new filter.
Tip: Avoid overtightening the new filter; follow manufacturer torque guidance. - 6
Install drain plug with new washer and torque
Reinstall the drain plug with a new crush washer and tighten to spec using a torque wrench.
Tip: Double-check the washer seating to prevent leaks. - 7
Fill with new oil
Using a funnel, add oil gradually to reach the manufacturer’s recommended capacity. It’s safer to add a bit less initially and top up after level checks.
Tip: Record the oil type and quantity for future maintenance. - 8
Check oil level and condition
Run the engine briefly, then check the oil level after the engine cools. Top up as necessary to the correct level and inspect for leaks.
Tip: Let oil settle 3-5 minutes before checking level for a more accurate reading. - 9
Dispose of used oil properly
Place used oil in a sealed container and take it to an authorized recycling facility.
Tip: Never pour used oil down the drain or onto the ground.
People Also Ask
Do I need to warm the engine before draining?
A light warm-up helps the oil flow more freely, making drainage easier and more complete. However, avoid overheating the engine, which can cause burns.
Warming the engine a little helps the oil drain better, but don’t burn yourself—keep it safe.
How much oil does a typical motorcycle need?
Capacity depends on the model and engine design. Check the owner’s manual or Oil Capacity Check data for your exact bike. Do not rely on a guess.
Oil capacity varies by bike—consult the manual or Oil Capacity Check data for your model.
Can I reuse old oil after a filter change?
No. Fresh oil provides proper lubrication and filtration. Reused oil loses protective properties and can cause engine wear.
No — always use fresh oil for a reliable lubrication.
How often should I change my motorcycle oil?
Follow the manufacturer’s recommended interval, which is based on engine design and operating conditions. High-mileage or extreme climates may require more frequent changes.
Follow the bike’s manual for change intervals; tougher riding might need more frequent changes.
Is it okay to mix synthetic and conventional oils?
It’s generally best to avoid mixing oil types. Use the same oil family that your manufacturer specifies for consistent protection.
Avoid mixing oil types; use the specified oil family for best protection.
What if I overfill the oil?
Overfilling can cause foaming, reduced lubrication, and pressure issues. If overfilled, drain a small amount or remove oil until the level is correct.
Overfill can cause problems; drain a bit to bring the level back to spec.
Watch Video
The Essentials
- Follow manufacturer specs for oil type and capacity
- Drain fully, replace the filter, and torque the plug correctly
- Check level after a short cycle and allow settling time
- Dispose of old oil responsibly
- Document the maintenance for your bike’s history