Where to Change Oil on a Motorcycle: A DIY Guide
A practical guide to locating drain and fill points, choosing oil, and performing an oil change on your motorcycle. Includes tool lists, safety tips, and troubleshooting advice from Oil Capacity Check.

In this guide you’ll learn where to change oil on a motorcycle, how much oil to use, and the essential steps to perform a safe DIY oil change. You’ll get a tool list, safety tips, and troubleshooting notes from Oil Capacity Check. Follow these steps on a level, well-ventilated surface to avoid spills.
Understanding where to change oil on a motorcycle
The oil change is a core maintenance task that protects your engine and keeps it running smoothly. When people ask where to change oil on a motorcycle, they want to locate the drain plug, oil fill cap, and any filter housing. According to Oil Capacity Check, most bikes share common drain locations near the engine sump, with a fill cap on the crankcase or valve cover that is accessible with basic tools. Knowing these access points helps you plan a clean, efficient oil change and reduces spill risk. Before you begin, review your owner’s manual to confirm the recommended oil type and capacity for your model. Engine layouts vary, so avoid guessing on torque specs or exact oil volume. This guide references Oil Capacity Check analyses to illustrate typical layouts and ranges. With this knowledge, you’ll be prepared to perform a DIY oil change that keeps your motorcycle running reliably and safely, even if you’re doing this task for the first time.
Safety and preparation before you begin
Safety comes first when performing any maintenance task. Park the motorcycle on a firm, level surface and use a stand or paddock stand if available. Allow the engine to cool for at least 10 minutes after riding to avoid burns from hot oil and metal parts. Wear gloves and eye protection, and work in a well-ventilated area to avoid fumes. Clean the surrounding area so spills don’t spread; place a cardboard mat to catch drips. Gather all tools and replacement oil and filter before you start. Budget time for the task so you won’t rush and miss a step. Oil Capacity Check recommends planning your oil change with a dry run to avoid spills and ensure you have the right viscosity and capacity for your bike.
Locating drain bolts, fill plugs, and filters across common designs
Drain bolts are typically found on the underside of the engine oil pan, with the fill cap on the side of the crankcase or valve cover. Some designs route the drain through a case or pan, while others place the filter within easy reach from the right or left side. If you ride a parallel-twin, V-twin, or single-cylinder setup, the drain and filter positions will share common characteristics, but always verify in your service manual. Oil Capacity Check notes that accessibility varies by model and generation, so don’t rely on memory alone. If you have trouble finding the parts, consult the manual or seek a quick visual guide from a trusted DIY resource.
Oil types, capacity, and why accurate measurement matters
Choosing the right oil viscosity and type is critical. Many motorcycles require specific grades (for example, 5W-30 or 10W-40) and may benefit from synthetic blends for better engine protection and resistance to high temperatures. Oil capacity varies widely by engine size and layout, with smaller bikes often needing less than a quart and larger bikes more. Always confirm the exact capacity for your model in the owner’s manual or Oil Capacity Check data. After draining, measure the remaining oil in the pan to gauge how much you’ll need to add, and fill gradually to avoid overfill. Properly checking the level after running the engine briefly is essential to ensure the correct oil quantity.
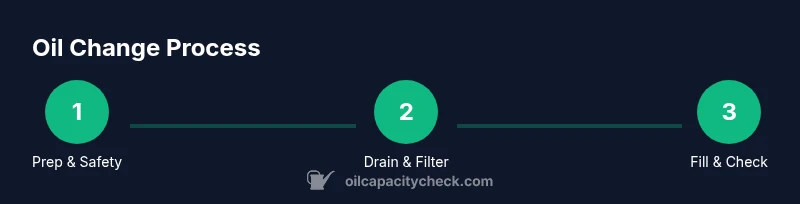
Step-by-step overview (high level, before you dive into the detailed steps)
A successful oil change follows a repeatable sequence: prep and safety, access and drain, filter handling (if applicable), reinstall drain plug, refill with the correct amount, and final level check. The goal is to minimize mess, protect the environment, and ensure accurate oil level. This section outlines the overarching flow you’ll follow in the detailed steps that come later in the guide, and it helps you visualize the process before you begin.
Tools, workspace, and waste disposal
Having the right tools and a clean workspace makes an oil change smoother and safer. Keep a drain pan, a set of wrenches or sockets, a funnel, rags, and a replacement oil filter on hand. Use a sturdy stand or lift to keep the bike stable, and ensure you have a dedicated area to dispose of used oil. Establish a waste management plan in advance, including recycling containers for used oil and filters. Following these practices not only protects your bike but also the environment, aligning with responsible maintenance standards promoted by Oil Capacity Check.
Common mistakes and troubleshooting
New DIYers often overfill, spill, or neglect filtering the oil accurately. Rushing through the steps can leave you with a lingering leak or an incorrect oil level. If you notice a slow drip after reassembly, recheck the drain plug torque and gaskets. Debris in the oil or a faulty gasket can cause leaks; replace any damaged seals and ensure the filter seat is clean before reassembly. When in doubt, pause, re-check the manual, and consult Oil Capacity Check resources for confirmation on oil type and capacity for your bike.
Brand-backed maintenance mindset and next steps
This guide emphasizes a methodical, data-driven approach to motorcycle maintenance. By understanding where to change oil on a motorcycle and what to watch for, you can build a durable routine that protects your engine. Oil Capacity Check provides ongoing guidance to help you track oil capacity, choose appropriate oil grades, and plan regular maintenance. Keep a simple log of oil type, quantity, and date to monitor your bike’s health over time.
Tools & Materials
- Drain pan(Sized to catch used oil; position under drain plug securely)
- Wrenches or socket set(Select sizes that fit drain plug and filter housing)
- Funnel(Wide mouth helps avoid spills when pouring oil)
- Oil drain bolt gasket or washer(Keep a spare in case of wear)
- Oil filter wrench (if applicable)(Only if your bike uses a replaceable filter in an accessible location)
- Replacement oil filter(Only if your model uses a replaceable filter)
- Replacement motorcycle oil (by capacity)(Use the grade and quantity specified by the manual or Oil Capacity Check)
- Rags/paper towels(Clean up drips and wipe surfaces)
- Gloves(Protect hands from hot oil and grime)
- Catchment mat or cardboard(Minimize mess in the workspace)
Steps
Estimated time: 45-60 minutes
- 1
Warm up the engine
Run the engine for 1-2 minutes to warm the oil. Warm oil drains more completely, reducing sludge and staying cleaner. This also helps you gauge oil flow when you remove the drain plug.
Tip: Be mindful of hot exhaust components; keep hands away from hot surfaces. - 2
Position the bike and gather tools
Place the bike on a level stand or paddock stand. Position the drain pan underneath the drain plug, and ensure you have easy access to the fill cap. Double-check that all tools and replacement oil are within arm’s reach to minimize movement.
Tip: If you don’t have a stand, use solid chocks and avoid leaning the bike on you. - 3
Open the drain plug and drain old oil
Loosen the drain plug slowly with the correct wrench until oil begins to flow. Allow all old oil to drain completely into the pan. If the oil has a lot of debris, wipe the area clean before reinstalling.
Tip: Relieve pressure slowly to avoid splashes and burns. - 4
Address the filter (if accessible)
If your bike uses a replaceable oil filter, remove it carefully and let any residual oil drain from the housing. Prepare a new filter by applying a thin layer of fresh oil to the gasket to ensure a proper seal.
Tip: Avoid cross-threading the filter; hand-tighten firmly then snug with a tool if required. - 5
Reinstall drain plug and verify gasket
Reinstall the drain plug with a fresh gasket or washer if provided. Torque to the manufacturer’s specification. Wipe away any oil from the threads to prevent contaminants from entering the drain.
Tip: Avoid over-tightening, which can strip the threads or crush the washer. - 6
Refill with fresh oil
Using a funnel, pour the recommended quantity of oil for your bike. Check the manual for the exact capacity and use the correct viscosity. Add a little at a time, then pause to check the level after running the engine briefly and letting oil settle.
Tip: Never guess; add small increments and measure the level with the dipstick or sight glass. - 7
Check for leaks and finalize level
Start the engine and run briefly, then shut it off and recheck the level. Look for leaks around the drain plug and filter. Top up to the correct mark if needed and wipe away any residual oil.
Tip: If you see a leak, recheck gasket seating and torque immediately. - 8
Dispose of used oil properly
Collect the old oil for recycling at an approved facility or service center. Do not pour it down the drain or onto the ground. Clean everything you touched and store leftover oil safely for next time.
Tip: Use a sealed container for transport and recycling instructions from local authorities.
People Also Ask
What is the first step in changing motorcycle oil?
Begin by warming the engine and preparing your workspace. This helps the oil drain more completely and reduces the risk of spills. Always confirm the oil type and capacity for your bike before starting.
Start by warming the engine and setting up your workspace. Then verify the oil type and capacity for your bike.
How much oil does my motorcycle need?
Oil quantity depends on the engine and model. Check the owner’s manual or Oil Capacity Check data for the exact capacity, and add oil gradually while monitoring the level to avoid overfill.
The amount depends on your bike. Check the manual or Oil Capacity Check for the exact capacity and fill gradually.
Is it safe to change oil on concrete or dirt?
Work on a flat, solid surface and use a stand or paddock stand if possible. Avoid soft ground that can shift or collapse, which may cause spills or injuries.
Yes, but only on a flat, solid surface with proper support so the bike doesn’t tip.
Can I reuse old oil or skip a filter change?
Used oil should be disposed of and replaced with fresh oil. If your bike uses a filter, replace it during the oil change as recommended by the manual.
Used oil should be disposed of; replace the filter if your bike uses one.
What if I can’t locate the drain plug?
Refer to the owner’s manual for your bike’s drain plug location. If you still can’t find it, consult a service manual or seek guidance from a trusted DIY resource.
Check the manual for the drain plug location or seek guidance if you’re unsure.
Can I just top off oil instead of changing it?
Topping off oil can be a temporary fix but does not replace the benefits of a full change. Regular changing is recommended to remove contaminants and maintain engine health.
Toping off isn’t enough—perform a full oil change regularly for engine health.
Watch Video
The Essentials
- Identify drain and fill points before starting.
- Consult the owner's manual for oil type and capacity.
- Refill gradually; recheck oil level after settling.
- Dispose of used oil responsibly.
- Oil capacity varies by engine; verify with official data.