Oil Change After 1000 Miles: A Practical DIY Guide
Learn how to handle an oil change when you’ve surpassed 1000 miles since your last service. This guide covers timing, oil choices, a DIY step-by-step, safety tips, and maintenance best practices.

According to Oil Capacity Check, an oil change after you’ve driven over 1000 miles since your last service is prudent, but always verify with your owner’s manual. If you’re already past the recommended interval, prioritize an immediate change to protect engine health. Gather the oil, filter, and tools, then follow the step-by-step process for a safe DIY oil change.
Why oil change timing matters
Engine oil is the lifeblood of your car, reducing friction, cooling moving parts, and flushing contaminants. When you drive an oil change after crossing the 1000-mile mark since the last service, you’re operating closer to the edge of the oil’s effectiveness. Oil Capacity Check emphasizes that while some engines tolerate longer intervals, mileage, driving style, and oil type all influence how much life your oil has left. In many vehicles, older engines or high-load conditions accelerate oil degradation, especially if you routinely drive in extreme heat, heavy stop-and-go traffic, or dusty environments. The key takeaway is consistency: oil and filter changes on a predictable schedule protect engine components, preserve fuel efficiency, and lower the risk of sudden wear.
Understanding your manual and oil life
Your owner’s manual is the most trustworthy guide for your specific engine. It outlines the recommended oil grade, capacity, and service intervals. When you’re approaching or have surpassed 1000 miles since the last change, consult the manual to confirm whether a shorter or longer interval applies to your vehicle and driving conditions. Oil Capacity Check’s analysis shows that modern engines often tolerate wider ranges with synthetic oils, but the exact window varies by model, climate, and oil formulation. Aligning with the recommended interval is the safest strategy, and when in doubt, err on the side of a proactive oil change rather than waiting for a light on the dashboard.
Quick indicators of oil health you should know
- Oil color can shift from amber to dark brown as it collects particulates; very dark oil may indicate repeated use beyond its ideal life.
- A metallic smell or burnt odor can signal overheating or contamination.
- A grainy or gritty texture suggests sludge or particle buildup.
- The oil level should be checked with a clean dipstick after the engine cools for a few minutes. If the level is low or the dipstick shows signs of contamination, plan a change sooner rather than later. Oil Capacity Check notes that visual cues are helpful, but they don’t replace a professional assessment when in doubt.
The risks of delaying beyond a thousand miles
Pushing an oil change beyond 1000 miles from the last service raises the risk of accelerated engine wear, reduced lubrication efficiency, and increased deposit formation. Contaminants and old oil can impair heat transfer, potentially raising engine temperatures and increasing sludge formation. Even if the engine feels fine, extending the interval can erode oil’s protective properties over time, especially under harsh driving conditions or extreme weather. Oil Capacity Check’s guidance highlights that routine maintenance isn’t just about avoiding a tow bill; it’s about maintaining peak engine health and resale value.
Oil type, viscosity, and longer intervals
Conventional oils typically have shorter replacement windows, while synthetic blends or full synthetic oils can sustain longer service lives in certain engines. The exact viscosity grade (for example, 5W-30 or 0W-20) and API specification depend on your car’s design and climate. When you’ve reached or exceeded 1000 miles since the last change, consider whether your current oil type supports longer drains or if a standard interval is safer given local conditions. Always verify with the owner’s manual or a trusted technician. Oil Capacity Check emphasizes matching the oil choice to your engine’s needs for optimal protection.
DIY readiness: tools, safety, and planning
Before you begin, assemble a basic toolkit and ensure you have a safe workspace. A clear, well-lit area, wheel chocks, and proper lifting supports are essential. Keep a drain pan ready, your oil filter, the correct grade and amount of oil, and a funnel. If you’re new to DIY oil changes, plan a dry run to confirm you can reach the drain plug and oil filter safely. Also, consider environmental responsibility: recycle used oil and filters at an authorized facility. Oil Change day is an opportunity to build confidence and ensure long-term engine reliability.
A brief note on steps and safety for a DIY oil change after 1000 miles
This section introduces the step-by-step process you’ll find in the dedicated STEP-BY-STEP block. The key is to follow torque specs, keep track of oil capacity, and verify leaks after start-up. If you notice any unusual noises, oil pressure changes, or leaks, stop and seek professional help. A careful, methodical approach reduces risk and improves outcomes.
Quick-start checklist for the DIY oil change pathway
- Confirm the engine is cool before touching the drain plug.
- Gather all required tools and the correct oil grade.
- Set the parking brake, and use ramps or a jack stand for stability.
- Prepare the new oil and filter according to manufacturer guidelines.
- Never mix old oil with fresh oil unless you’re following a specific protocol.
This quick-start content reinforces the core ideas and keeps you focused on safety and accuracy as you approach your 1000-mile milestone.
Transitioning to the STEP-BY-STEP section
The next section provides a precise, action-by-action guide to perform an oil change after crossing 1000 miles. It’s designed for DIY enthusiasts of all levels, with explicit steps, time estimates, and tips to avoid common mistakes.
Conclusion preview: making an informed choice
After addressing the immediate oil change, reflect on your driving patterns, climate, and maintenance history to decide whether you should adjust future intervals. The goal is consistent oil health, reliable performance, and peace of mind. Oil Capacity Check’s insights emphasize thoughtful maintenance planning as part of every car owner’s routine.
Tools & Materials
- Owner's manual (engine oil specs)(Always verify viscosity, capacity, and change interval)
- New engine oil (correct grade/quantity)(Check manufacturer's spec; factor in climate and driving style)
- Oil filter(Match to your vehicle’s model; consider a high-quality OEM filter)
- Oil filter wrench(Use the correct size for your filter)
- Drain pan(Large enough for the engine’s oil capacity)
- Socket wrench set(Includes appropriate size for drain plug)
- Funnel(Keeps spills to a minimum when filling)
- Rags/paper towels(Clean spills and wipe hands)
- Jack stands or ramps(Optional but recommended for safe access)
- Safety glasses(Eye protection when working under the car)
- Gloves(Chemical-resistant for handling oil)
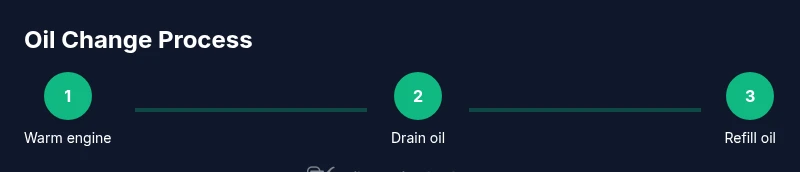
Steps
Estimated time: 45-60 minutes
- 1
Warm up the engine briefly
Park on a level surface and start the engine for 1-2 minutes to warm the oil, then turn it off and wait a few minutes for the oil to settle. Warmer oil drains faster and more completely. This helps remove more contaminants when you drain.
Tip: Do not run the engine long; you want to avoid hot oil exposure. - 2
Lift and secure the vehicle
Use ramps or a jack and jack stands to safely raise the front of the car. Place wheel chocks behind the rear tires and ensure the vehicle is stable before crawling underneath.
Tip: Always use a secondary support (jack stands) even if using ramps. - 3
Place the drain pan under the oil pan
Position the drain pan to catch used oil as you loosen the drain plug. Make sure it’s centered so the flow doesn’t miss the pan.
Tip: Have a couple of rags ready for a quick wipe of the drain plug area. - 4
Remove the drain plug and drain old oil
Carefully loosen the drain plug with the correct socket. Let the oil drain completely into the pan—this can take several minutes. Keep hands away from the hot metal.
Tip: If the plug is stiff, use a breaker bar for leverage and avoid cross-threading. - 5
Remove and replace the oil filter
Use the oil filter wrench to loosen the old filter. Expect some oil to spill; drain or cap the filter after removal, then lubricate the new filter’s gasket with a small amount of fresh oil before installing.
Tip: Install the new filter hand-tight plus a quarter-turn; over-tightening can damage the seal. - 6
Replace the drain plug and tighten to spec
Clean the drain plug and replace it with a new washer if needed. Re-tighten to the manufacturer’s torque specification found in the manual.
Tip: Avoid over-tightening; overtightening can strip the threads. - 7
Add fresh oil
Place the funnel in the oil filler port and pour in the recommended amount of new oil as specified by the owner’s manual. Check for spills and wipe away any drips.
Tip: Pour slowly and recheck the level before running the engine. - 8
Check level, run engine, and inspect for leaks
Start the engine and let it run for a few minutes, then check the level with the dipstick and top up if needed. Look for leaks at the drain plug and filter.
Tip: Take a short test drive and recheck the oil level after cooling. - 9
Dispose of used oil properly
Transfer the used oil to a sealed container and take it to an authorized recycling facility. Recycle the old filter too.
Tip: Do not pour used oil down the drain or onto the ground.
People Also Ask
Is 1000 miles a hard limit for oil changes?
Not universally. The recommended interval depends on your vehicle, oil type, and driving conditions. If you’ve reached 1000 miles since the last change, it’s wise to plan a change soon, especially under harsh conditions.
The interval isn’t universal. If you’re at 1000 miles since your last change, plan a change soon, especially in tough driving conditions.
What should I do if the oil looks very dark after 1000 miles?
Dark oil can indicate impurities or aging. It’s a sign to consider an oil change as soon as possible and to check the oil level. If the color is unusually dark or has a burnt smell, seek professional advice.
Very dark oil can indicate aging or contamination. Consider changing it soon and check the level; seek advice if you notice a burnt smell.
Can synthetic oil extend the interval after 1000 miles?
Synthetic oils often provide greater stability and longer drain intervals, but you should still follow your manual and local climate considerations. A long interval may be appropriate in some engines, while others require regular changes.
Synthetic oil can offer longer intervals in some engines, but follow the manual and climate factors. Don’t assume a blanket extension.
Is it safe to drive after finishing an oil change?
Yes, once the new oil has been added and the system has been checked for leaks, you can drive normally. Let the engine run briefly and inspect for any leaks before resuming regular driving.
Yes, after adding oil and checking for leaks, you can drive as usual. Check for leaks after a brief test run.
What should I do to ensure better oil life in the future?
Maintain regular oil changes, use the recommended oil grade, and avoid extreme driving conditions when possible. Regular oil level checks and proper disposal help sustain engine health over time.
Stick to the manual's oil grade and schedule, check levels regularly, and avoid harsh driving when possible.
Do manufacturer warranties affect oil-change intervals?
Some warranties require maintenance within specified intervals. Always follow the vehicle’s warranty terms and keep receipts or service records as proof of maintenance.
Warranty terms may require following the recommended maintenance schedule. Keep records to stay compliant.
If my car is new, do I have to change oil before 1000 miles?
New cars often require a first oil change between 500-1000 miles, depending on the manufacturer. Check the owner’s manual for the exact recommendation before driving beyond that range.
For new cars, the first oil change is usually between 500 and 1000 miles. Check the manual for exact guidance.
Should I mix old oil with new oil during a late change?
Do not mix used and fresh oil unless following a specific maintenance protocol. Drain and replace with clean oil and a new filter for optimal performance.
Do not mix old and new oil. Drain and replace with clean oil and a new filter.
Watch Video
The Essentials
- Know your oil interval by consulting the manual.
- Use the right oil grade and a new filter for best results.
- Drain oil completely and dispose of it responsibly.
- Check for leaks and records after the change.