Does an Oil Change Trigger the Engine Light? A Practical Troubleshoot Guide
Wondering if an oil change can make the engine light come on? This urgent guide explains the common causes, how to diagnose them, and what to do now to protect your engine.

The engine light after an oil change is rarely caused by the oil itself. In most cases, it’s a simple issue like a loose oil cap, an incorrect dipstick reading, or a sensor catching oil residue. According to Oil Capacity Check, recheck the fill cap, the oil level, and the type; if the light remains, scan for fault codes and reset carefully.
Does an oil change trigger the engine light? What to know
If you’ve ever wondered does oil change make engine light come on, you’re not alone. The short answer is: usually not, but maintenance steps can unintentionally trigger a warning. In many cars, a missing or loose oil cap, an overfull or underfilled oil level, or residue around sensors can trigger the check-engine indicator. According to Oil Capacity Check, the most common culprits are simple, physical issues that are easy to fix without tools beyond basic hand torque. Start with the basics: confirm the oil cap is seated properly and the dipstick reading is accurate, then verify the oil level matches your vehicle’s specification. If the light persists after these checks, you’ll want to scan for fault codes to identify the exact system involved.
Why the engine light can come on after maintenance
Maintenance work, even routine oil changes, can disturb electrical connectors, sensors, or protective seals. A cap that isn’t fully tightened can vent and trigger a pressure sensor, while overfilling oil can foul breathers or crankcase ventilation sensors. In some cases, the light is simply indicating a system needs attention for a fault code unrelated to the oil change itself. The key is to stay calm and follow a logical diagnostic path rather than guessing.
How sensors and codes relate to an oil change
Modern engines rely on sensors to monitor oil pressure, level, temperature, and filtration efficiency. When you perform an oil change, the vehicle’s computer may need to re-run self-tests. If a sensor reads an out-of-range value due to residual oil, venting, or a loose cap, codes may be stored and the light illuminated. Clearing codes without addressing the root cause can cause the light to return. A proper scan helps identify the exact system involved—from the engine itself to emissions controls.
Immediate checks you can perform right now
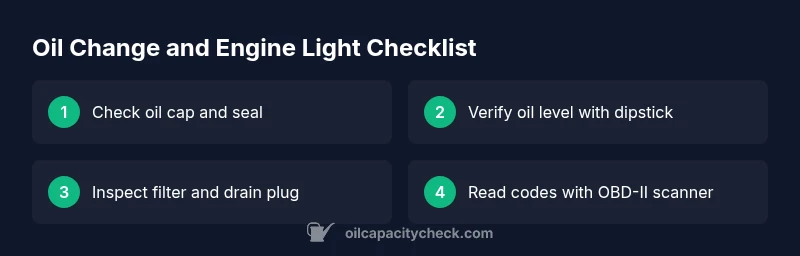
Before you rush to a shop, perform these quick checks: verify the oil cap is snug and the seal is intact, re-check the oil level with the correct procedure and vehicle dipstick, and inspect for any visible leaks around the filter and drain plug. If you recently changed filters or topped off with a different oil grade, ensure it matches the manufacturer’s specification. A clean, level surface and a cooled engine help prevent accidental readings.
A practical diagnostic mindset (overview)
Treat the light as a signal that something related to oil, filtration, or sensors is worth a closer look. Start with the simplest fixes, then move to diagnostics that read fault codes. Keeping a log of what was done during the oil change—oil grade, amount added, cap torque, and date—helps you spot patterns over time. When in doubt, consult the vehicle’s service manual or a trusted technician.
Preventive steps to avoid false alarms after oil changes
To minimize false engine-light alarms, always use the manufacturer-recommended oil type and grade, ensure proper oil fill to the precise level, and replace the oil filter with the correct model. Use proper torque on the drain plug and cap, and verify that the PCV system is functioning. After any maintenance, perform a short test drive to allow the engine and sensors to re-learn normal operating parameters.
Steps
Estimated time: 30-60 minutes
- 1
Gather tools and safety gear
Park on level ground, engine off and cool. Gather the oil cap, a clean rag, the correct dipstick, a calibrated oil funnel, and a basic OBD-II scanner. Have the vehicle manual handy for specification guidance.
Tip: Safety first: use gloves and eye protection when handling hot components. - 2
Inspect the oil cap and seal
Visually inspect for cracks or damage. Ensure the cap threads are clean and the cap sits snugly. If the seal is worn, replace the cap or seal to prevent venting that can trigger sensors.
Tip: Inspect cap alignment as you tighten; cross-threading leads to leaks and false readings. - 3
Check oil level and correct any discrepancy
Wipe the dipstick, insert fully, pull out, and read at the proper level with the engine off. If low, top up with the recommended oil grade to the specified mark. Avoid overfilling.
Tip: Always use the exact grade and viscosity recommended in the owner’s manual. - 4
Inspect the oil filter and drain plug area
Check for signs of oil seepage around the filter and drain plug. Tighten the drain plug to the manufacturer’s torque specification and verify the filter is seated correctly.
Tip: Don’t over-tighten; O-rings and seals can fail if torqued beyond spec. - 5
Read fault codes with an OBD-II scanner
Connect the scanner, read current and pending codes, and note any that relate to oil pressure, emissions, or misfire. Do not clear codes until you’ve verified the root cause.
Tip: Write down any codes before clearing; codes guide you toward the faulty system. - 6
Reset the light if appropriate
If codes are cleared and there are no abnormal symptoms, reset the light following the vehicle’s procedure. If the light returns, pursue professional diagnostics.
Tip: If the issue recurs, schedule service promptly to avoid potential damage.
Diagnosis: Engine light comes on after an oil change
Possible Causes
- highLoose or missing oil cap
- mediumIncorrect oil level reading due to dipstick procedure
- lowOil leaks at filter or drain plug
Fixes
- easyTighten or replace the oil cap and ensure its seal is intact
- easyRecheck oil level and top up to the correct spec using the dipstick method
- easyRun a diagnostic scan to read codes and reset if appropriate
People Also Ask
Can a loose oil cap really trigger the engine light?
Yes. A loose cap can allow venting and trigger sensors, causing the check-engine light to illuminate.
Yes, a loose oil cap can trigger the check-engine light.
Will a fresh oil change automatically turn off the engine light?
Not automatically. If codes remain or a root issue exists, the light may stay on until the problem is resolved.
Not automatically; you may need to address the root cause and clear the codes.
Should I reset the light myself after an oil change?
Only after you’ve verified there are no active fault codes indicating a problem.
Only reset after confirming there are no active fault codes.
Can using the wrong oil cause the engine light to come on?
Using an oil that doesn’t meet spec can affect engine performance and sensor readings, potentially triggering warnings.
Using the wrong oil can trigger warnings if it affects engine sensors.
What should I do if the light stays on after basic checks?
Proceed with a diagnostic scan to identify the exact fault code. If unresolved, seek professional assistance.
If it stays on, scan for codes and seek professional help if needed.
How long before I should schedule service after an oil change?
If the light persists after checks, schedule service promptly to prevent potential damage.
If it persists, schedule service promptly.
Watch Video
The Essentials
- Check the oil cap first and reseat properly
- Verify oil level matches manufacturer specs
- Use an OBD-II scanner to read fault codes
- Do not reset the light without confirming root cause
- If in doubt, consult Oil Capacity Check for guidance