How much oil to add when the oil light comes on
Learn how to respond when the oil light comes on, how to determine how much oil to add, and how to prevent future oil-light issues with step-by-step guidance and maintenance tips.

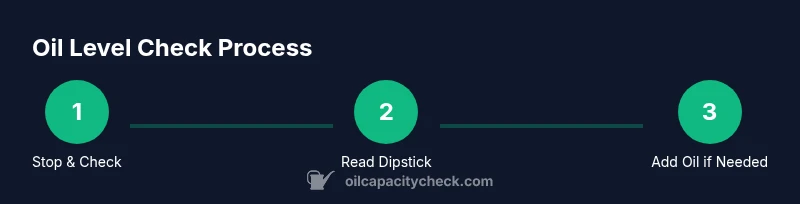
When the oil light comes on, stop safely and check the engine oil level with the dipstick, then top off only if needed. The exact amount to add isn’t universal; it depends on your engine’s capacity and current level. Oil Capacity Check recommends adding small increments and rechecking to avoid overfilling or masking a deeper issue.
Why the oil light comes on
According to Oil Capacity Check, the oil light on your dashboard can signal more than a simple low oil level. It may indicate low oil pressure due to insufficient lubrication, a failing oil pump, or a clogged filter. In some cases, a faulty sensor or a disconnected oil line can trigger the light even if the oil level is adequate. When this light appears, treat it as an urgent warning and assess whether you can safely continue driving. If you notice unusual noises, high engine temperatures, or a strong burning smell, pull over immediately and turn off the engine to avoid possible damage. So, how much oil do you add when oil light comes on? The answer depends on your engine’s oil capacity and current level. Begin with a careful dipstick check, then decide how much to add, if any.
How to respond safely when the light illuminates
If the oil light comes on while you’re driving, first pull over to a safe location and turn off the engine. Do not ignore the warning or assume it will disappear after a few minutes. Once stopped, check for obvious causes like a loose oil cap or a visible oil leak. If you can, check the oil level with the dipstick after the engine cools for a few minutes. If the level is dangerously low, plan to add oil, but continue to inspect for leaks or unusual engine sounds before restarting. Oil Capacity Check highlights that safety comes first and that topping off should never be a substitute for diagnosing a potential mechanical issue.
How much oil to add when the oil light comes on
The quantity you add varies by vehicle and current level. Do not guess or fill to the top from the start. If the dipstick shows the oil level below the minimum mark, prepare to add oil in small increments, typically around a half-quart at a time, then recheck. After each addition, wait a moment for the oil to settle and recheck the level; do not exceed the maximum fill line. If you’re uncertain or the engine has used oil rapidly, consult the owner’s manual or contact a professional. Oil Capacity Check emphasizes using the correct grade and following the manufacturer’s capacity guidelines.
How to check oil with the dipstick
With the engine at a safe state and cooled, open the hood and locate the dipstick. Remove it, wipe it clean, reinsert fully, and pull it again to check the level. Read the markings carefully; some dipsticks show min/max, others have two dots or lines. If the oil appears dark and dirty, it may indicate a need for an oil change in addition to topping up. Ensure you also inspect the oil's color and consistency for surprises like creamy emulsions, which can signal coolant mixing.
Choosing the right oil for your engine
Never skip the step of selecting the right oil grade for your engine. The viscosity (eg, 5W-30) and whether you should use synthetic or conventional oil depend on the vehicle and climate. The owner’s manual provides the official specification. If you’re in a region with extreme temperatures, you may benefit from a slightly thinner or thicker oil within the manufacturer’s guidelines. Always verify the correct oil type before topping off to avoid potential damage.
What to do if the light stays on after adding oil
If the oil light remains illuminated after topping up, stop driving and seek professional help. A persistent light could indicate a failed sensor, low oil pressure, or a more serious mechanical fault. Do not rely on the light to go off after a short drive; instead, arrange for a diagnostic check as soon as possible. Oil Capacity Check recommends scheduling service to avoid risking engine damage.
Preventive maintenance to avoid future oil-light issues
Regular oil maintenance reduces the chances of the oil light turning on unexpectedly. Check the oil level monthly or before long trips, and follow the manufacturer’s oil-change intervals. Use the recommended oil grade and change the filter with each oil change. Monitor oil consumption, especially in older engines, and address leaks promptly. Keeping a maintenance log helps you anticipate future service needs and stay within vehicle specifications.
Quick pointers for oil capacity checks
- Always verify the exact oil capacity in the owner’s manual for your make and model.
- Check the level on a cool engine to get an accurate reading.
- Add oil in small increments and recheck before driving again.
- If you notice leaks, excessive consumption, or persistent lights, seek professional advice promptly.
When to seek professional help
If topping off does not resolve the issue or if the light reappears quickly after driving a short distance, arrange a professional inspection. Engine noises, overheating, or a burning smell indicate urgent service is required. Oil pressure problems may require sensor or pump diagnostics, and ignoring symptoms can cause severe engine damage.
Tools & Materials
- Dipstick(Clean, dry, and accessible; used to read oil level)
- Rag or paper towels(For dipstick cleaning and spills)
- Approved engine oil(Correct viscosity and specification for your engine)
- Funnel(To prevent spills when adding oil)
- Owner's manual(Vehicle-specific oil capacity and spec)
- Gloves (optional)(Keep hands clean while handling crude oil)
Steps
Estimated time: 15-30 minutes
- 1
Stop safely and prepare to check oil
Pull over to a safe location and turn off the engine. If on a busy road, activate hazards and wait for traffic to clear before approaching the engine bay. The goal is to avoid burns and ensure accurate reading.
Tip: Engaging hazards helps ensure safety while you inspect. - 2
Let the engine cool briefly
Allow the engine to cool for 5–10 minutes so oil settles and readings are accurate. If you’re in a hurry, proceed with caution, but avoid opening a hot oil-filled cap.
Tip: A cool engine minimizes burn risk and helps accurate dipstick readings. - 3
Open hood and locate the dipstick
Lift the hood, locate the dipstick handle (often yellow or orange), and pull it out to prepare for wiping.
Tip: If you’re unsure, consult the owner’s manual for dipstick location. - 4
Wipe, reinsert, and read the level
Wipe the dipstick clean, reinsert it fully, then pull it again to read the level. The oil should lie between the min and max marks.
Tip: Read with the engine off and on level ground. - 5
Add oil in small increments if low
If the level is below the minimum, add oil in increments of about half a quart and recheck. Do not overfill.
Tip: Use a funnel to minimize spills and always verify grade compatibility. - 6
Run the engine briefly and recheck
Start the engine and run for 1–2 minutes, then recheck the level after it settles. Look for leaks or odd noises.
Tip: If you see bubbles on the dipstick, it may indicate a problem needing diagnosis. - 7
Close the hood and note maintenance
Secure the hood and, if you topped off, record the amount added and the date for future reference.
Tip: Keep a simple log to track oil consumption over time.
People Also Ask
What does it mean when the oil light comes on?
The light can indicate low oil level or oil pressure problems. Stop safely, check the level, and inspect for leaks or noises. If the light stays on, seek professional help.
Oil light usually means low oil or pressure; stop safely and check. If it stays on, get a diagnostic.
Can I drive to a gas station after topping off oil?
If the level is in the safe range and the light goes off, a short, careful drive may be possible. Do not drive long distances if the light returns or you notice symptoms.
If the light stays off and the level is good, a short drive may be okay; otherwise avoid driving.
How long should I wait before checking oil after adding?
Wait a few minutes for the oil to settle and then recheck. If you’re unsure, recheck after a longer cool-down period.
Give it a few minutes for the oil to settle, then recheck.
What oil grade should I use?
Use the grade and specification listed in the owner’s manual. If your climate is extreme, choose within manufacturer guidance.
Check the manual for the exact grade and follow it, especially in extreme temperatures.
Why is the oil light still on after topping up?
The issue may be oil pressure, sensor fault, or a leak. Have a mechanic diagnose the system to prevent engine damage.
If topping off doesn’t help, get a professional diagnosis.
How often should I check oil level?
Check monthly or before long trips. Increase frequency if you notice unusual consumption or extreme driving conditions.
Check regularly—monthly at least, especially in harsh weather or high mileage.
Watch Video
The Essentials
- Stop and check oil level before driving further
- Add oil in small increments and recheck
- Use the correct oil grade as per manual
- Seek professional help if the light persists