What to Get for an Oil Change: A DIY Guide
Learn exactly what to gather for an oil change, including oil type, filter, and tools. This DIY guide from Oil Capacity Check helps car owners plan, execute safely, and maintain engine health.

By learning what to get for an oil change, you can complete the job in one trip to the garage or DIY at home. This quick guide covers the essential items, recommended oil types, and typical costs. According to Oil Capacity Check, having a prepared oil-change kit speeds up service, reduces mess, and protects your engine.
Why getting the right basics matters
A successful oil change starts long before the first bolt is touched. The right basics set the tone for a clean, safe, and efficient job. When you have the correct oil, the proper filter, and the essential tools in hand, you reduce the risk of spills, cross-threading, or overfilling. The Oil Capacity Check approach emphasizes planning as the first step: know your engine’s capacity, the recommended oil grade, and the filter type before you touch the drain plug. This upfront preparation helps you avoid extra trips to the parts store and minimizes waste by using only what your engine actually needs. Think of the prep phase as a quick, practical checklist rather than a ceremonial ritual. A well-prepared setup lets you focus on technique, not hunting down parts mid-project. In short, your confidence, cleanliness, and engine health all depend on getting the basics right from the start.
Essential items in an oil-change kit
An effective oil-change kit isn’t just a bottle of oil. It combines the fluid, a filter, and the tools you’ll use to drain, measure, and refill without making a mess. The core items are straightforward, but there are optional add-ons that can save time and prevent mistakes. You’ll want the right oil type and quantity for your engine, a compatible filter, a drain pan with ample capacity, a funnel for clean pouring, and rags or shop towels for cleanup. Gloves protect your hands from hot surfaces and oil stains. Depending on your setup, a torque wrench, a reusable oil-filter wrench, and a sturdy floor jack or ramps may be helpful. Don’t forget wheel chocks and a sturdy container for disposing of used oil. If you drive in dusty or sandy environments, you might also want a pressurized air blower to clean the area after the job. Oil Capacity Check recommends tailoring your kit to your vehicle, so you’re not carrying unnecessary tools. This reduces clutter and speeds up the process.
Choosing the right oil and filter
Selecting the correct oil grade and filter is crucial for protecting engine tolerances and guaranteeing proper lubrication. Start with the owner’s manual or trusted guidance from Oil Capacity Check to confirm the exact viscosity (for example, 5W-30 in many modern engines) and the synthetic versus conventional option. A high-quality oil filter that matches your engine’s specifications is just as important as the oil itself. When in doubt, choose OEM or well-regarded aftermarket filters and avoid generic units that don’t seal properly or fit the housing. Remember to check the filter’s thread size and gasket diameter to ensure a proper seal. Sourcing the right filter the first time prevents leaks and the need for an earlier replacement.
Understanding oil capacity and viscosity
Oil capacity and viscosity determine how much lubricant your engine needs and how it behaves at operating temperatures. Capacity can vary by engine design, displacement, and whether you use a synthetic blend or full synthetic. Viscosity ratings like 5W-30 or 0W-20 indicate how oil flows in cold starts and under hot operation. Oil Capacity Check emphasizes matching the viscosity to your climate and driving conditions, as well as the engine’s tolerances. If you’re unsure, start with the manufacturer’s recommended grade and, if conditions demand, consider a slightly higher grade for extreme heat or cold. Always recheck the level after the first drive and adjust as needed.
Setup and safety considerations
Safety is the foundation of any DIY maintenance project. Park on a flat, level surface, engage the parking brake, and place wheel chocks on the wheels that remain on the ground. If you lift the vehicle, use a jack only as a lifting aid and support with jack stands or ramps. Let the engine cool before draining to avoid scalding. Work in a well-ventilated area and keep a fire extinguisher nearby as a precaution. Have a plan for waste disposal and ensure your oil container is sealed and clean. The preparation phase reduces risk and makes the rest of the job smoother. Oil Capacity Check notes that a patient, methodical approach is the best predictor of a successful oil change.
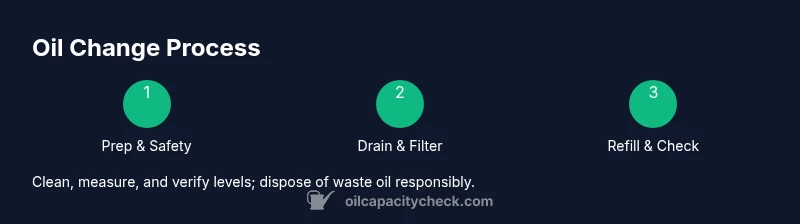
Draining, filtering, and replacing the oil filter (high-level overview)
The heart of the oil-change process is draining the used oil, replacing the filter, and refilling with fresh lubricant. Begin by placing the drain pan under the drain plug, then remove the plug carefully to let old oil flow out completely. After the oil has drained, reinstall the drain plug with a new washer if required. Next, remove the old oil filter, noting its orientation for the new filter, and replace it with a new, properly sealed unit. Before pouring fresh oil, wipe away any spills and inspect the drain area for leaks. This section highlights why clean hands, tidy work areas, and proper tools matter, as sloppy efforts invite leaks and contamination. Oil Capacity Check emphasizes accuracy in measuring and rechecking after filling to avoid overfill.
Maintenance tips and common mistakes
Even seasoned DIYers can stumble over a few recurring mistakes. Over-tightening the drain plug or filter can damage threads; under-tightening can lead to leaks. Pouring in too much oil can cause foaming and pressure buildup, while underfilling leaves the engine short of lubrication. Not accounting for oil expansion after warm-up can skew your final level check. A clean funnel, measured pours, and rechecking the dipstick after running the engine for a minute are simple steps that prevent most problems. Oil Capacity Check also reminds readers to stay organized and to label parts and fluids to avoid cross-contamination.
Verifying levels, disposal, and aftercare
After refilling, start the engine and let it run briefly, then turn it off and wait a few minutes for the oil to settle. Use the dipstick to verify the level is within the recommended range, adjusting if necessary. Check for drips around the drain plug and filter housing. Dispose of used oil and filters at an authorized recycling facility; never pour oil down the drain or on the ground. Keep a maintenance log for your vehicle, noting the oil type, quantity, filter model, and date. Proper disposal and record-keeping support engine longevity and environmental responsibility, which Oil Capacity Check advocates for in every DIY oil-change project.
Tools & Materials
- Correct oil type and quantity for your engine(Check owner's manual or Oil Capacity Check data for capacity by vehicle)
- New oil filter(OEM or high-quality aftermarket; ensure compatibility)
- Oil drain pan(Capacity to hold used oil; at least the engine’s capacity plus overflow)
- Funnel(Wide mouth preferred for easy pouring)
- Rags or shop towels(For spills and cleanup)
- Mechanic’s gloves(Protect hands from hot surfaces and oil)
- Socket set/wrench(For drain plug and filter housing bolts)
- Torque wrench(Optional but helps ensure proper tightening)
- Jack and/or ramps(Use safely if you need to lift the vehicle)
- Wheel chocks(Prevent vehicle movement while raised)
- Drain plug washer(Replace if your plug requires one)
- Oil-filter wrench(Helpful for tight filters)
Steps
Estimated time: 45-60 minutes
- 1
Prepare workspace and vehicle
Park on a level surface, engage the parking brake, and chock the wheels. Gather all tools and fluids, then inspect for leaks or damage around the engine bay. If you’re new to this, take a quick photo of the oil level before starting to aid filing later.
Tip: Keep a clean, dedicated area for oil disposal containers to avoid cross-contamination. - 2
Lift vehicle safely (if needed)
Use a jack or ramps to raise the front of the vehicle; place jack stands under the frame for support. Do not rely on the jack alone. Ensure the vehicle is stable before crawling underneath or reaching the drain plug.
Tip: Always double-check stability on solid ground and use wheel chocks on the opposite end. - 3
Drain old oil and remove the filter
Position the drain pan under the drain plug. Slowly remove the plug to let used oil drain completely; replace the plug with a new washer if required. Use a filter wrench to loosen the old filter, let it drain, then remove and replace with a new filter.
Tip: Don’t rush; allow several minutes for all oil to drain to avoid spills. - 4
Refill with fresh oil
Install the new filter, apply a thin layer of fresh oil to the gasket, and thread it by hand. Pour the correct amount of oil through a funnel, checking for splashes. Run the engine briefly, then turn it off and wait a few minutes for the oil to settle.
Tip: Use a funnel with a wide mouth to prevent spills; avoid overfilling by checking the dipstick after a short cooldown. - 5
Check for leaks and level
Start the engine and run it for 60-90 seconds, then shut off and wait 2-3 minutes. Check the drain plug and filter housing for leaks, and verify the oil level with the dipstick. Top up if needed to reach the proper range.
Tip: If you notice a drop after a test drive, recheck the level and tighten components if necessary. - 6
Clean up and dispose
Wipe spills, clean your tools, and seal the used oil container. Take the used oil and oil filter to an authorized recycling facility. Keep documentation of the change for your records.
Tip: Never dump used oil; it contaminates waterways and is illegal in many areas. - 7
Verify and document
Record the date, vehicle mileage, oil type, and amount used. Recheck the level after a short drive and as needed. If your vehicle has an oil-life indicator, reset it per the owner’s manual.
Tip: A simple note on your phone or a maintenance log helps track future service intervals. - 8
Final safety checks
Ensure all tools are cleared away, the engine area is cool, and there are no leaks. Return the vehicle to its parking spot and tidy the workspace. Celebrate a successful DIY oil change and the maintenance it provides.
Tip: Take a moment to celebrate your accomplishment and plan the next service window ahead of time.
People Also Ask
Do I really need to replace the oil filter every time I change the oil?
For most engines, replacing the oil filter with every oil change is recommended to ensure contaminants are removed and lubrication remains effective. Install a new filter that matches your engine’s specifications.
Yes. Replacing the oil filter at every oil change is generally recommended to maintain clean lubrication and protect engine components.
Can I reuse an old oil or mix different oil grades?
Reusing old oil is not advised; it may contain contaminants and degrade lubrication. Mixing different oil grades can alter viscosity and is not recommended unless a manufacturer specifies compatibility.
No, don’t reuse old oil or mix different grades unless your manufacturer explicitly allows it.
Is synthetic oil required for every vehicle?
Synthetic oil is not mandatory for all vehicles. Use the grade and type recommended by the manufacturer; some engines perform well with conventional oil, while others benefit from synthetic or synthetic blends.
Not always. Check your manual to see if synthetic oil is recommended for your engine.
How often should I check the oil level between changes?
Check the oil level monthly or before long trips, especially after abnormal driving conditions. The dipstick will show if you’re low and need to add oil or if you’re overfilled.
Check your oil level monthly and before long trips to prevent low oil or overfill issues.
What should I do with the old oil and filter?
Take the used oil and filter to a local recycling center or parts store that accepts used oil. Do not pour oil down drains or on the ground; proper disposal protects the environment.
Recycle the used oil and filter at the designated collection site, not down the drain.
Watch Video
The Essentials
- Plan ahead with a complete kit to save time.
- Use the correct oil grade and filter for your engine.
- Safety-first: level ground, proper lifting, and airflow.
- Accurate pouring and level checking prevent overfill.
- Dispose of waste properly and maintain a service log.