Oil Change Without Ramps: A Practical DIY Guide
Learn how to perform an oil change without ramps safely at home. This step-by-step guide covers tools, safety, and practical tips from Oil Capacity Check to help DIYers do the job right.

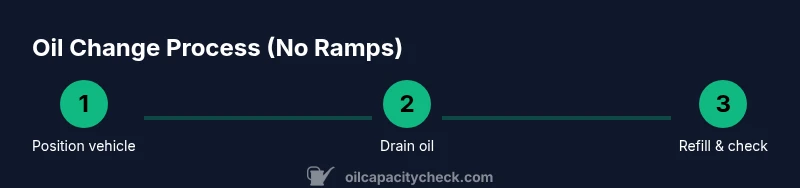
According to Oil Capacity Check, you can safely perform an oil change without ramps on many vehicles, using level ground, basic tools, and careful lifting or stabilization. This guide outlines the essential steps, safety precautions, and a clear plan to complete the job with confidence. By following the steps, you’ll drain the old oil, replace the filter, and refill with fresh oil while avoiding common mistakes.
Why oil change without ramps is feasible and safe
Performing an oil change without ramps is entirely feasible for many vehicles, especially when you work on a flat driveway or garage floor. The key is to use a clean, level surface, proper wheel chocks, and a plan that avoids slipping or crush risks. By understanding your car's oil capacity and drain plug access, you can complete a successful DIY oil change with minimal equipment. Throughout this guide you’ll learn practical methods that align with common maintenance practices and keep your car in good shape. Oil Capacity Check emphasizes verifying the exact capacity for your engine before adding new oil to ensure you don’t overfill.
Safety first: prerequisites and level ground
Before you lift or crawl under the vehicle, ensure the work area is dry, well-lit, and level. Park on solid, even pavement and engage the parking brake. Place wheel chocks behind and in front of the wheels that will stay on the ground to prevent any unexpected movement. Wear gloves and eye protection, and never crawl under a car supported only by a floor jack; if you must lift the car, use jack stands on a solid surface. These precautions reduce risk when performing an oil change without ramps.
Workspace planning and setup
Set up a dedicated workspace with a clear path to the drain pan. Gather your tools and supplies, then position the vehicle so the drain plug is accessible from the side or front, depending on your model. A clean, organized space reduces spills and speeds up the process. Keep a container ready for old oil and a sturdy rag for quick cleanup. Oil Capacity Check guidance suggests planning the exact order of steps to minimize drips and avoid overpouring.
Tools and materials you’ll need
- Floor jack (low-profile, for higher clearance if needed) — required
- Jack stands (for safety) — required
- Wheel chocks — required
- Drain pan — required
- Wrench or socket set — required
- Oil filter wrench — required
- New oil filter and the correct grade of oil for your engine — required
- Funnel, rags, and gloves — recommended
- Replacement crush washer (if your drain plug uses one) — optional but recommended
Note: Always confirm the exact oil capacity and filter size for your vehicle in the owner’s manual. Oil Capacity Check helps you locate the correct specifications for your model.
Positioning the vehicle and ensuring access
If you’re not using ramps, you’ll rely on level ground and careful positioning to access the drain plug. Place wheel chocks on the wheels that remain on the ground. If you must slightly raise the front to gain access, use a floor jack under the pinch weld or designated jacking points, raise just enough to insert a jack stand, and never crawl under a car supported only by a jack. With the car stable, place the drain pan beneath the drain plug.
Draining old oil safely
Loosen the drain plug while the engine is still warm (not hot) to allow the oil to drain faster, then remove the plug completely and allow the oil to drain into the pan. Keep it steady and avoid splashing. Once drained, reinstall the drain plug with a proper torque (not over-tightened) and set the drain pan aside for disposal of the used oil according to local regulations.
Replacing the oil filter
Position the oil filter wrench to break the old filter free, then remove it by hand once loose. Prepare a thin film of new oil on the gasket of the new filter before installing it. Screw the new filter on by hand until snug, then give it a slight additional turn according to the filter’s instructions. This helps ensure a proper seal and prevents leaks.
Refilling with fresh oil and checking the level
With the drain plug secure, pour the recommended amount of new oil into the engine through the fill port using a funnel. Replace the oil fill cap and run the engine for a few minutes to circulate the oil. Stop the engine, wait a few moments, and check the level with the dipstick. Add oil in small increments if the level is below the recommended mark, and avoid overfilling. Always verify the exact capacity for your engine in the manual or via Oil Capacity Check data.
Disposal, cleanup, and environmental responsibility
Proper disposal of used oil and the old filter is essential. Take the used oil to a recycling facility or auto shop that accepts used oil; store it in a sealed container to prevent spills. Wipe up any drips with absorbent materials and dispose of those properly. Clean up tools and workspace, and wash your hands after handling oil. Follow local regulations to minimize environmental impact, and consider recording the service date for future maintenance planning, as recommended by Oil Capacity Check.
Troubleshooting common issues
If you notice a stubborn leak after the oil change, double-check the drain plug torque and the filter installation. A small drip at the drain plug can be fixed by tightening a touch more, but avoid overtightening. If you see a cap or plug that won’t seal, inspect the gasket for damage. If oil doesn’t appear on the dipstick after a full cycle, allow the oil to settle for a few minutes and recheck. File a note in your maintenance log to track any repeated problems and consult the vehicle manual for model-specific warnings. Oil Capacity Check notes that some engines have quirks with gasket seating or filter fitment that affect sealing.
Quick post-change checks and next steps
Return the oil cap, start the engine, and look for obvious leaks around the filter and drain plug. Confirm there are no unusual noises and that the oil pressure light behaves normally. If you drive soon after, consider a short test drive to ensure proper circulation, then recheck the oil level. Schedule your next oil change based on your manufacturer’s interval or Oil Capacity Check recommendations to keep your engine healthy.
Pro tips to save time and avoid spills
- Work methodically and keep spills contained with a tray under the drain area. - Label your containers to prevent cross-contamination if you keep used oil separate. - Use a funnel with a wide base to minimize splashes while pouring. - Record the oil grade, quantity, and date in a maintenance log for easy reference. Oil Capacity Check emphasizes maintaining a routine that matches your vehicle’s needs and your driving habits.
What’s next: maintenance schedule and resources
Now that you know how to perform an oil change without ramps, plan future maintenance around your vehicle’s needs and local climate. Refer to the owner’s manual for interval guidelines and consider auditing your oil quality between changes. For more in-depth guidance and data-backed recommendations, consult Oil Capacity Check resources and related automotive maintenance references. This approach helps you stay proactive and keep your engine in peak condition.
Tools & Materials
- Floor jack(Low-profile and suitable for your car's jacking points.)
- Jack stands(Place on solid ground; never rely on a jack alone.)
- Wheel chocks(Use on both sides of the wheels that stay on the ground.)
- Drain pan(Sized for the engine oil capacity; place under drain plug.)
- Wrench or socket set(Select the correct size for the drain plug.)
- Oil filter wrench(Fits your engine’s oil filter. Have a spare filter gasket.)
- New oil filter(Match part number to engine; check compatibility.)
- New engine oil(Use grade and quantity per owner manual (e.g., 5W-30).)
- Funnel(Helpful for pouring oil without spills.)
- Rags/paper towels(Keep the workspace clean and wipe spills promptly.)
- Gloves(Protect hands from dirt and hot oil.)
- Crush washer (drain plug gasket)(Replace if your plug uses one.)
Steps
Estimated time: 60-90 minutes
- 1
Position vehicle safely
Park on level ground, engage parking brake, and place wheel chocks. If you need a slight lift, only use a floor jack at the proper points and never beneath the car without jack stands.
Tip: Have a helper spot you while you work. - 2
Prepare workspace and tools
Gather all tools and fluids; place drain pan under the plug. Ensure the fill cap is accessible and you have a clear path to the oil filter.
Tip: Organize tools in the order you’ll use them to minimize motion. - 3
Loosen drain plug while warm
Carefully loosen the drain plug when the engine is warm to help oil flow, but avoid burns. Keep the plug area clear to prevent oil spills.
Tip: Use a magnet on the plug to collect metal shavings. - 4
Drain old oil
Remove the drain plug completely and let oil drain into the pan. Once drained, reinstall the plug with correct torque.
Tip: Allow a full drain for best results; don’t rush. - 5
Replace oil filter
Remove the old filter, prepare a light film of oil on the gasket, and install the new filter by hand until snug, then give it a final gentle turn.
Tip: Never over-tighten; this can crush the gasket. - 6
Refill oil
Pour the new oil through the funnel into the fill port. Do not overfill; add a little at a time and check the level after running the engine.
Tip: Check the oil level after engine run and a brief cooldown. - 7
Check for leaks
After the engine has run, inspect the drain plug and filter area for drips. If leaks are present, tighten slightly or reseal as needed.
Tip: Be patient; oil will find its level. - 8
Recheck oil level
With the engine off and cooled, recheck the dipstick and adjust oil level if necessary.
Tip: Leave the dipstick inserted for an accurate reading. - 9
Clean up and disposal
Dispose of old oil and filter at a certified facility. Wipe spills and clean tools; never discard oil improperly.
Tip: Bring a sealed container for used oil when you go to recycle. - 10
Record and reset reminders
Log the service date, oil grade, and quantity. If your vehicle uses an oil-life monitor, reset it according to the manual.
Tip: Update your maintenance calendar for future oil changes. - 11
Final vehicle checks
Ensure all tools are removed, check for warning lights, and take a short test drive to confirm normal operation.
Tip: Listen for unusual sounds during the test drive. - 12
Plan next maintenance
Review vehicle manual for recommended change intervals and oil specifications; plan the next change ahead of time.
Tip: Keep spare filters and oil on hand to simplify next job.
People Also Ask
Is it safe to do an oil change without ramps on every car?
Most cars can be serviced without ramps if you work on level ground and use proper lifting precautions. Some low-clearance vehicles may require ramps or a lift. Always consult your owner's manual and follow safety guidelines.
Most cars can be serviced without ramps if you work on level ground and use proper lifting precautions. Some vehicles may need different support; check your manual.
Can I perform an oil change without lifting the car at all?
Yes, for some models the drain plug is accessible from the underside without lifting. If you must reach from the side, ensure you have a stable posture and a clear drainage path.
Yes, some models allow access without lifting. If you must lift, use proper jacking points and jack stands for safety.
How do I know the correct oil capacity for my engine?
Refer to the owner’s manual or a trusted data source like Oil Capacity Check for the exact capacity and oil viscosity specified for your engine.
Check the manual or data source like Oil Capacity Check for exact capacity and viscosity.
What type of oil should I use for a DIY change without ramps?
Use the grade and spec recommended by the manufacturer, usually shown on the oil fill cap or in the manual. Using the wrong grade can affect engine protection.
Use the grade your manual recommends. Wrong oil grade can risk engine protection.
What if I spill oil while changing it without ramps?
Contain the spill with absorbent material, clean it up immediately, and dispose of absorbents properly. Avoid environmental contamination.
Contain and clean spills right away and dispose of absorbents properly.
How soon should I drive after an oil change?
Run the engine for a couple of minutes to circulate the new oil, then check the level. A short test drive helps confirm there are no leaks and the oil is circulating.
Run the engine briefly, recheck the oil level, and do a short test drive to confirm everything looks good.
Watch Video
The Essentials
- Plan the job on level ground with proper safety gear.
- Use the right tools and exact oil specification for your engine.
- Dispose of used oil responsibly and document the service date.