How to Clean Oil Change: A Practical Cleanup Guide
Learn a practical, step-by-step method to clean up after an oil change. Contain spills, safely dispose of used oil, and wipe down tools and surfaces to protect your garage, vehicle, and environment.

After an oil change, cleanliness matters to prevent slips and spills and to protect engine hardware. This quick guide shows you how to clean the work area, wipe surfaces, dispose of waste properly, and recycle used oil. You’ll need absorbent pads, disposable rags, gloves, and a sealed waste bag to start safely.
Why Cleanliness After an Oil Change Matters
Cleanup after an oil change isn't just about tidying up. Spills can create slip hazards, attract dirt, and corrode engine components if left unattended. A tidy workspace also helps you spot leaks early, which protects your engine and reduces the risk of costly repairs. In this guide, you’ll learn practical, repeatable steps to keep your area clean, safe, and compliant with local disposal rules. By treating cleanup as part of the maintenance routine, you extend the life of your tools and minimize environmental impact while preserving a professional workspace.
Key principles to remember: clean as you go, contain spills immediately, and dispose of waste responsibly. These habits save time during the next oil change and reduce potential damage to driveway surfaces or garage floors. The goal is not perfection, but consistency: a small, ongoing effort yields a cleaner shop and safer work environment for you, your vehicle, and the planet.
Safety and Environmental Considerations
Always wear gloves and eye protection when handling used oil and cleaning agents. Work in a well-ventilated area and avoid open flames near spilled oil. Use absorbent materials to contain spills and prevent oil from entering storm drains or soil. Check your local regulations for oil disposal, and use an approved container to store used oil until you can recycle it. Keeping a dedicated spill kit nearby will speed cleanup and reduce the chance of accidental exposure. If oil contacts concrete, add more pads and allow time for absorption while avoiding rushing cleanup. Wash hands thoroughly after handling oil and disposing of wipes.
What You’ll Need for Cleaning After an Oil Change
Having the right supplies on hand makes cleanup faster and safer. Keep a dedicated spill kit with absorbent pads, cat litter or a commercial mat, and sealable bags. Nitrile gloves protect your skin, while shop towels or disposable rags are ideal for quick wipe-downs. A mild degreaser or detergent helps break down oil residues on metal surfaces, and a disposable scraper or plastic putty knife can help remove stubborn residues without scratching paint. Store tools and waste containers in a labeled bin to simplify future jobs.
Containing Spills and Preventing Contamination
Start by isolating the area around the oil drain and any containers. Use absorbent pads to surround the spill and work from the outer edge inward. If the spill is on concrete, place additional pads and allow time for absorption. Collect the saturated pads in a sealable bag and label it as oil-contaminated waste. Do not rinse oil into drains; instead, transfer it to an approved disposal container. Keeping the cleanup area tidy limits the chance of spread and makes inspection easier.
Waste Disposal and Recycle Practices
Used engine oil is hazardous waste and must be handled separately from household trash. Transfer used oil from the drain pan into a labeled, sealable container and take it to a recycling facility or a designated drop-off point. Wipe tools and containers with absorbent material before washing, but avoid washing oil remnants down the sink or storm drain. Recycle oil filters where allowed, and store oily rags in a closed metal container to reduce fire risk. Follow local rules for disposal to protect water quality and soil health.
Surface Care and Preventive Maintenance
Once the area is clean, perform a quick inspection of gaskets, plugs, and hoses for signs of wear or leaks. Clean the engine bay only with approved products and avoid aggressive solvents that can harm rubber parts. After cleanup, wash hands and dispose of single-use items properly. Consider scheduling a short maintenance ritual after every oil change to reinforce good habits and reduce the chance of spills over time.
Tools & Materials
- Nitrile gloves(Protect hands from oil and solvents)
- Oil-absorbent pads or spill socks(Place around spills to contain them)
- Cat litter or inert absorbent material(Assist with heavy spills on concrete surfaces)
- Disposable shop towels or rags(For quick wipe-downs and precision cleaning)
- Seal-able waste bags or metal container(Store used absorbents and wipes safely)
- Plastic scraper or putty knife(For removing stubborn residues without scratching)
Steps
Estimated time: 30-45 minutes
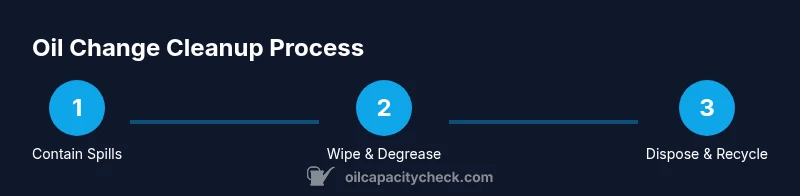
- 1
Prepare the workspace
Park the vehicle in a well-ventilated area. Clear a clean zone and lay down absorbents, plastic sheeting if available, and your tools. Put on gloves and keep a trash bag handy to collect waste as you go. This upfront setup minimizes splatter and keeps cleanup focused.
Tip: Pre-arrange your kit and supplies before you start so you can work efficiently without searching for items mid-cleanup. - 2
Contain and absorb the spill
If oil has spilled, surround it with pads and work from the outer edge toward the center. Avoid rinsing into drains; absorbent pads should capture the liquid first. Collect saturated pads in a sealable bag labeled as oil-contaminated waste.
Tip: Work from the spill edge inward to prevent spreading; use a dustpan to transfer saturated pads into the disposal bag. - 3
Wipe and degrease surfaces
Wipe all oily surfaces with shop towels. Apply a mild degreaser or detergent to metal parts, then wipe again with clean towels. Do not spray cleaners toward hoses or electrical components unless approved for those parts.
Tip: Test degreaser on a small area first to avoid discoloration or damage. - 4
Dispose of used materials properly
Place all used absorbents, rags, and wipes into a labeled sealable bag or metal container. Do not mix with regular trash. Take the bag to your oil recycling point when available, or transfer contents to a dedicated waste container for later recycling.
Tip: Keep the disposal container closed and clearly labeled until disposal. - 5
Inspect for leaks and clean tools
Inspect the drain plug area, hoses, and gaskets for signs of new leaks. Clean and dry tools before putting them away to prevent rust and cross-contamination, and photograph any suspicious spots for reference.
Tip: A quick visual check now saves headaches later. - 6
Finalize cleanup and store supplies
Dry the floor or surface completely, return tools to their designated spots, remove gloves, and wash hands. Repack your spill kit so it’s ready for the next oil change.
Tip: Confirm there is no slippery residue before leaving the area.
People Also Ask
Do I need to wear protective gloves during cleanup?
Yes. Gloves protect your skin from oil and cleaning chemicals and reduce exposure. They also help keep your hands clean when handling rags and absorbents.
Yes—gloves protect your skin from oil and cleaners and make cleanup easier.
What should I do with used engine oil?
Take used oil to a recycling facility or approved drop-off point. Do not pour it down the drain or on the ground. This protects water quality and complies with local regulations.
Take the used oil to a recycling center and never pour it down the drain.
Can I wash the spill with water?
Avoid rinsing oil into drains. Use absorbents to capture the spill and dispose of contaminated materials properly. If local rules permit washing, use minimal water and direct runoff to approved areas.
Don’t rinse the spill into drains; use absorbents and proper disposal, and only wash where allowed by local rules.
Are there regulations for disposing oil filters?
Check your local regulations. Many areas require recycling or specific disposal for oil filters to prevent environmental contamination.
Oil filters usually need recycling or special disposal per local rules.
How often should I clean after an oil change?
Incorporate cleanup into your post-oil-change routine. A quick wipe-down and disposal step after each change is usually sufficient, with a full cleanup as needed after spills.
Make cleanup a routine part of every oil change, so it becomes quick and automatic.
Watch Video
The Essentials
- Prepare the workspace before cleanup.
- Contain spills immediately to prevent spreading.
- Dispose of waste through proper channels and recycle where possible.
- Inspect for leaks after cleanup to protect your engine and environment.