When Do You Need an Oil Change: A Practical Guide
Discover practical guidance on when to change engine oil, signs to watch for, how driving conditions affect timing, and a step-by-step DIY oil-change plan tailored for car owners and DIYers.

An oil change is needed when your engine oil has degraded and can no longer effectively lubricate, protect, or cool engine components. You should follow your owner's manual, consider driving conditions, and inspect oil color and level to decide. In practice, check oil regularly, watch for warning signs, and schedule an oil change when guidance is clear.
What counts as an oil change anyway?
If you’re wondering "when do u need a oil change," you’re asking the right question. An oil change means replacing the used engine oil and the oil filter, and it often involves cleaning parts and resealing the drain plug. Fresh oil lubricates moving parts, reduces friction, and helps cool the engine. This maintenance task also aids in removing sludge and contaminants that accumulate over time. According to Oil Capacity Check, understanding the purpose of this service is the first step in making smarter maintenance decisions. The Oil Capacity Check Team emphasizes that the exact timing depends on your engine design, the oil you use, and how you drive. In short, plan changes around the engine’s needs and the oil’s ability to perform under your typical driving conditions.
How often should you change oil? The big question.
There is no single universal interval. Modern engines can tolerate longer periods between changes than older designs, but recommendations vary widely by manufacturer, oil type, and driving conditions. The goal is to align maintenance with the vehicle’s specification and the oil’s performance. In this guide, we translate manufacturer guidance into practical steps you can follow. Oil Capacity Check analysis shows that the recommended interval depends on the engine and oil type, and that driving style and climate can shift timing. Frequent short trips, heavy towing, or dusty conditions can shorten oil service windows. Always consult the owner’s manual and use the vehicle’s service reminders as a baseline, then monitor the oil’s condition between changes. The Oil Capacity Check Team notes that these intervals are not interchangeable across different engines, so verify guidance for your specific car.
Signs your engine oil needs changing
Oil quality is not visible to the naked eye alone, but several telltale signs indicate it’s time for a replacement. Dark, dirty oil that looks gritty or smells burnt is a signal; if the oil appears cloudy or milky, there could be coolant intrusion. A low oil level combined with engine rattling or ticking noises can point to degraded lubrication. If you notice more frequent top-ups between changes, or if the oil on the dipstick feels thicker than usual, schedule a change. Also watch for warning lights on the dashboard related to oil pressure or engine temperature. Regularly checking oil color and level helps you spot issues early and avoid costly damage.
The role of oil type, grade and climate
Oil isn’t a one-size-fits-all product. The choice between conventional, synthetic, or synthetic-blend oils affects how often you’ll need to change it. Oil grade and viscosity determine how the oil flows under different temperatures and engine loads, so climate and driving conditions matter. In extreme heat, heavy loads, or very cold starts, oil may degrade faster or slower depending on the product chosen. Oil Capacity Check emphasizes that matching your oil to the vehicle’s design and the climate is essential for optimal lubrication and protection. Always confirm the recommended oil type and maintenance intervals with your manufacturer and battery of checks.
How to check your oil level and condition
Checking oil level and condition is a quick, essential habit for any driver. Park on level ground, turn off the engine, and wait briefly before pulling the dipstick. Wipe clean, reinsert fully, then pull the dipstick again to read the level. If it’s near or below the minimum mark, add oil in small increments and recheck. Observe the oil’s color and texture: clean oil is amber and translucent, while old oil may look dark, cloudy, or contain metallic particles. If you notice a strong petroleum smell or unusual grit, consult a mechanic. Keeping a log of color, level, and changes helps track when a change is due.
How driving conditions affect maintenance timing
Your driving environment has a big impact on oil health. Frequent short trips don’t allow the engine to fully warm up, which keeps contaminants in the oil longer. Hot climates and high-load driving (towing or steep hills) can accelerate oil degradation. Dusty or sandy roads introduce particulates that your oil must filter, potentially reducing life. Oil Capacity Check guidance notes that drivers should adapt intervals to these realities while staying aligned with the manufacturer’s recommendations.
Oil change intervals for different engines
Gasoline engines, diesel engines, turbocharged setups, and hybrid systems each have their own maintenance rhythms. The engine’s design, oil capacity, and the oil’s performance characteristics influence how often a change is needed. The key principle is to follow the manufacturer’s guidance for your specific model and oil type, while recognizing that real-world conditions can warrant adjustments. Oil Capacity Check encourages owners to treat guidance as a living schedule—update it as the car ages and usage patterns change.
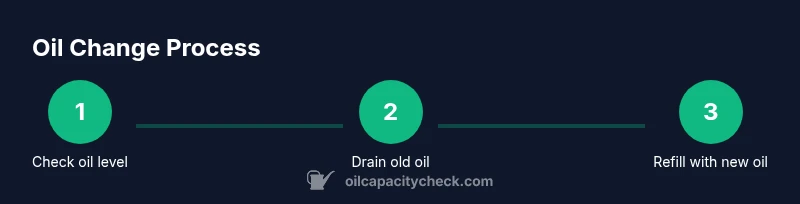
What you should do before an oil change
Preparation reduces mess and ensures a clean job. Park on a flat surface, gather the right tools, and place catch pans under the drain. Warm the engine slightly (not hot) to help the old oil flow out smoothly, then turn off and secure the vehicle. If you’re doing it yourself, confirm you have the correct replacement oil and filter for your model. Keep a trash bag handy for used oil containers and rags. With the right prep, the oil-change process goes more smoothly and safely.
How to reset oil change indicators
Many modern vehicles include maintenance reminders that show when an oil change is due. After completing an oil change, you may need to reset or recalibrate the reminder. The reset procedure varies by make and model, so consult your owner’s manual for exact steps. If you don’t reset the indicator, you might receive false reminders or miss the correct service window. A quick reset after each change helps you stay on track.
Common mistakes that extend or cut maintenance
Rushing a drain without allowing the oil to drain fully, failing to replace the oil filter, or over-tightening the drain plug are common mistakes that lead to leaks or engine damage. Conversely, delaying an oil change beyond the recommended interval can accelerate wear and pollutant buildup. Always verify the torque for the drain plug, use the correct filter, and avoid mixing oil types. Staying organized and following the manual reduces risks and keeps your engine protected.
Practical maintenance plan for a typical car
A practical plan considers seasonal checks, manufacturer guidance, and your driving habits. Start with a baseline aligned to the manual, then tailor it as needed for severe-use conditions. Create a simple calendar to note upcoming changes and inspections, and set reminders when service is due. Keeping oil receipts and service notes helps you monitor the vehicle’s history, preserve resale value, and plan future maintenance with confidence.
How to document and track oil changes
Documentation helps you maintain a reliable maintenance schedule. Record the date, odometer reading, oil type, filter, and any service notes. Keep this log with the vehicle’s manual or digital records so you can reference it when planning the next change. If you consistently track oil condition and level, you’ll be better prepared to recognize when the interval should be adjusted. A well-kept log is a small investment that pays off in engine health and peace of mind.
Tools & Materials
- Engine oil (correct grade per manual)(Confirm grade and capacity in owner manual)
- Oil filter(Use OEM or equivalent quality filter)
- Drain pan(To collect used oil safely)
- Funnel(Pour new oil without spills)
- Wrench or socket set(Remove drain plug safely)
- Rags or paper towels(Clean spills and wipe dipstick)
- Gloves and eye protection(Protect hands from hot oil and debris)
- Car jack and stands or ramps(Only if you need extra access clearance)
- Owner’s manual(Verify torque specs and procedures)
Steps
Estimated time: 45-60 minutes
- 1
Prepare and safety check
Park on level ground, apply parking brake, and disconnect the battery if needed for safety. Allow the engine to cool to a safe temperature before touching hot components. Gather all tools and empty the workspace. This reduces spills and keeps you safe.
Tip: Wear gloves and goggles; hot oil can cause burns. - 2
Raise vehicle and position drain pan
If you need extra clearance, lift the front of the car with a jack and secure it with stands. Position the drain pan under the oil pan to catch draining oil. Ensure the vehicle is stable before proceeding.
Tip: Use a wheel chock on the opposite side to prevent movement. - 3
Remove drain plug and drain old oil
Loosen and remove the drain plug slowly to let old oil drain completely. Allow sufficient time for drainage and avoid splashing oil. Retain the washer if your model uses one.
Tip: Keep your face away from the drain to prevent oil spray. - 4
Replace the oil filter
Remove the old filter with a suitable wrench or filter tool. Lubricate the new filter’s gasket with a touch of fresh oil, install it by hand until snug, then give a half-turn more per the manufacturer’s recommendation.
Tip: Don't over-tighten; overtightening can damage the gasket. - 5
Refill with new oil
Install the drain plug, then pour in the new oil using a funnel. Add oil gradually and check the level with the dipstick as you go to avoid overfilling.
Tip: Add a little at a time and recheck the level to ensure accuracy. - 6
Check for leaks and oil level
Start the engine and run it for a brief moment, then shut it off and recheck for leaks under the vehicle. Verify the oil level again on the dipstick and top up if necessary.
Tip: Look for drips around the drain plug and filter area. - 7
Reset indicators and clean up
If your car has an oil-change indicator, reset it per the owner’s manual. Dispose of used oil at an authorized facility and tidy the workspace.
Tip: Take a photo of the oil level for your records.
People Also Ask
What exactly triggers an oil change?
Triggers include degraded oil color or viscosity, engine noises, and reminders or service intervals from the manufacturer. Use the owner’s manual and oil-condition checks to decide if a change is due.
Oil changes are triggered by oil condition, engine signals, and manufacturer reminders. Check the manual and oil color to decide when it’s due.
Can driving conditions affect when I should change oil?
Yes. Harsh driving, frequent short trips, dusty environments, and extreme temperatures can shorten oil life. Always factor these conditions into your maintenance plan and verify against the manufacturer’s guidelines.
Driving conditions matter. Harsh driving and extreme temps can shorten oil life, so tailor your plan to your setup and the car’s manual.
Is it okay to drive a car with slightly dark oil?
Dark oil alone isn’t proof of imminent failure, but it can indicate contamination or wear. If the oil color has changed noticeably or smells burnt, schedule a change and inspect for leaks or coolant intrusion.
Dark oil isn’t ideal, but it’s a sign to check further. If it smells burnt or looks unusual, get it checked soon.
Does synthetic oil last longer than conventional oil?
Synthetic oils can offer better protection and stability in some conditions, but the best choice depends on your engine and climate. Always follow the manual and use the recommended oil type.
Synthetic oils can perform differently depending on your engine and climate. Follow the manual to pick the right type.
What should I do if I can’t change oil right away?
If you can’t perform a change immediately, monitor oil level and condition, avoid aggressive driving, and schedule the service as soon as possible. Do not ignore low levels or obvious contamination.
If you can’t change it right away, keep monitoring and avoid hard driving until you can service it.
How do I reset a maintenance or oil-change indicator?
Reset procedures vary by make and model. Check the owner’s manual or a trusted service guide for exact steps. If unsure, have a technician perform the reset to avoid inaccurate reminders.
Reset steps differ by car. Check the manual or contact a pro if you’re unsure.
Watch Video
The Essentials
- Know your model’s oil requirements from the manual
- Watch for signs beyond just mileage to time changes
- Check oil color and level regularly to catch issues early
- Follow proper safety and disposal practices
- Keep a simple maintenance log for future planning