Oil Change Without Changing Filter: A Practical Guide
Learn how to perform an oil change without changing the filter, when it's appropriate, safety steps, and how to monitor engine health. Guidance from Oil Capacity Check for DIY enthusiasts.

According to Oil Capacity Check, an oil change without changing the filter is a targeted service that drains the old oil while leaving the existing filter in place. This approach can save time and reduce waste when the filter is known to be clean and the manufacturer allows it. Use this guide to decide if and how to perform it safely.
What is an oil change without changing the filter?
An oil change without changing the filter is a partial service where you drain the old oil and replace it with fresh oil while leaving the existing oil filter in place. This can save time and reduce waste when the filter is known to be clean and the manufacturer allows it. Oil Capacity Check notes that the decision should be guided by the vehicle’s condition, the filter’s age, and the manufacturer’s guidance. This approach is generally more common for routine top-offs in limited scenarios rather than a full-service interval.
When this approach makes sense (and when it doesn't)
There are cases where skipping a filter change can be acceptable: if the filter is relatively new, the oil has not been in service long, and the manufacturer explicitly allows extended drain intervals. However, for most cars, the filter captures contaminants and helps protect the engine; changing the filter with every oil change is the safer, more thorough option. Oil Capacity Check analysis shows that following OEM maintenance schedules minimizes risk, especially for high-mileage engines or severe driving conditions. If you suspect the filter is clogged, dirty, or past its service life, plan a full filter change at the next opportunity.
Safety and preparation you should never skip
Before you begin, ensure you have a level work surface and the engine is cool. Wear gloves and safety glasses to protect against hot oil and sharp edges. Position a drain pan to catch used oil, and gather the correct grade and amount of oil for your engine. Keep a clean workspace and have rags handy to wipe spilled oil. If your vehicle requires a specific filter type or torque on the drain plug, refer to the owner's manual and manufacturer specifications.
What affects oil capacity and how to plan
Even if you skip the filter change, you still need to replace the used oil with the correct volume. The total capacity depends on your engine, oil grade (synthetic vs conventional), and filter type. Consult the owner's manual and Oil Capacity Check's database to confirm the precise quantity. If you repack the drain plug washer, ensure a snug seal to prevent leaks. After refilling, check the level with the dipstick and recheck after a few minutes of rest.
Common mistakes and how to avoid them
- Not letting all old oil drain before adding new oil leads to underfill and inaccurate oil level readings.
- Overfilling can cause foaming and engine damage.
- Forgetting to reinstall the drain plug washer can cause leaks.
- Skipping a filter change when the OEM schedule calls for it can compromise protection.
- Failing to dispose of old oil properly can harm the environment.
- Failing to recheck the oil level after running the engine can leave you with an incorrect reading.
Tools & Materials
- Engine oil (correct grade and quantity)(Check owner's manual for capacity (±0.1 qt))
- Drain pan(Must hold at least the engine's total oil capacity)
- Funnel(Large enough to control pour)
- Wrench or socket for drain plug(Size matches drain plug)
- Rags or shop towels(For cleanups and spills)
- Gloves(Chemical-resistant preferred)
- New drain plug washer(If you replace the washer, avoid over-tightening)
- Ramps or jack stands(For easier access if needed)
Steps
Estimated time: 45-60 minutes
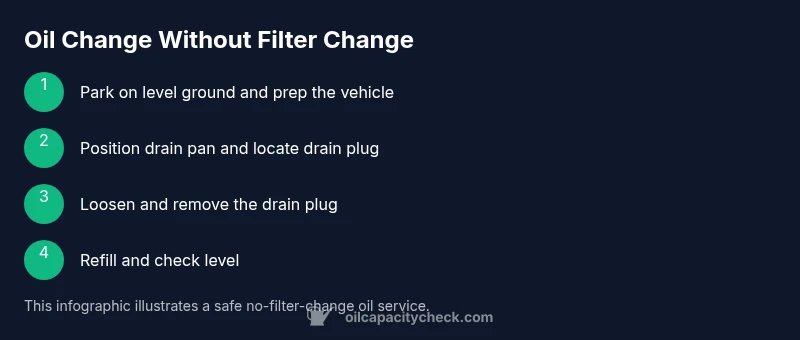
- 1
Park on level ground and prep the vehicle
Ensure the engine is cool, apply parking brake, and place wheel chocks. This reduces the risk of movement and injury while you work.
Tip: Set a clear workspace and keep tools within reach. - 2
Position drain pan and locate drain plug
Slide the pan under the oil pan and locate the drain plug. Ensure the area is clean to prevent debris from entering the drain.
Tip: If you can't see the plug, adjust vehicle height on ramps. - 3
Loosen and remove the drain plug
With the proper socket, carefully loosen the plug and let the oil drain completely into the pan. Do not remove the plug fully until the oil is drained.
Tip: Stand to the side to avoid hot oil spray. - 4
Reinstall drain plug and seal
Clean the plug and washer, then reinstall and snug to manufacturer torque rating. A proper seal prevents leaks.
Tip: Use a new washer if provided and avoid over-tightening. - 5
Refill with fresh oil
Slowly pour the correct amount of oil through the fill opening using a funnel. Check the manual for capacity and adjust as needed.
Tip: Pour gradually and avoid overfilling. - 6
Check oil level with the dipstick
Wait a few minutes for the oil to settle, then check the level on the dipstick. Add more oil if needed to reach the full mark.
Tip: Wipe the dipstick clean before rechecking. - 7
Start engine and check for leaks
Run the engine for a short period, then inspect the drain plug and oil pan for drips. Recheck the oil level once the engine is off and cooled.
Tip: Look for unusual smells or smoke around the engine. - 8
Dispose of used oil properly
Transport used oil in a sealed container to a recycling facility or service center that accepts used oil.
Tip: Never pour used oil down the drain or on the ground. - 9
Document service details
Note date, mileage, oil grade, and the fact that you did not replace the filter this time for future reference.
Tip: Keep the receipt and service log in a known place.
People Also Ask
Is it safe to skip replacing the oil filter during an oil change?
In most cases, changing the filter is part of a full oil service. Skipping it can reduce protection against contaminants. Use this only when explicitly allowed by the manufacturer and the filter is known clean.
Skipping the filter isn't ideal for most engines, but it can be acceptable if the manufacturer allows it and the filter is very new.
How do I know if my filter needs replacement?
Signs include excessive engine wear, high mileage between changes, and any visible contamination on the filter. If in doubt, replace the filter with the next oil change.
If you're unsure, it's safer to replace the filter during the next service.
Can I extend oil change intervals if I don't replace the filter?
Extending intervals without changing the filter can increase engine contaminants. Follow OEM schedules and consult a professional if you tow or drive under severe conditions.
It's best to stick to the manufacturer's schedule.
Will this affect warranty coverage?
Not following manufacturer maintenance guidelines can impact warranty. Always verify with the dealer if you plan to skip the filter change.
Check your warranty terms before deciding to skip the filter.
Is it harder to do at home if the filter isn't changed?
Leaving the filter in place doesn't inherently make the job harder, but you risk contaminated oil if the filter is clogged. A home setup is feasible with proper safety steps.
Yes, it's doable at home with safe steps.
What if I notice leaks after finishing?
If you see leaks, stop and tighten the drain plug or the filter area as needed, then re-check. If leaks persist, seek professional help.
Tighten and recheck; seek help if leaks continue.
Watch Video
The Essentials
- Follow manufacturer guidance for filter changes.
- Ensure oil capacity and grade match your engine.
- Plan to replace the filter with the next oil change if OEM schedule requires it.
- Dispose of used oil responsibly.