How to Know If Oil Change Is Due: A DIY Guide
Discover how to tell when your car needs an oil change by checking oil level, color, and indicators. This step-by-step guide from Oil Capacity Check helps DIYers assess oil health and plan maintenance with confidence.

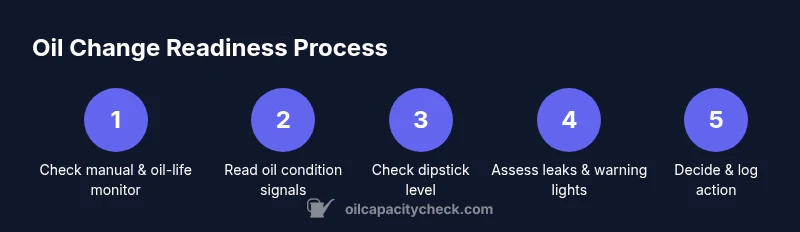
By the end of this guide, you’ll know exactly how to tell if an oil change is due. You’ll learn the main signals to check: oil level and color, the presence of burning smell, and any warning lights, plus how to use your vehicle’s maintenance schedule or oil-life monitor. According to Oil Capacity Check, combine indicators with your manual for reliable timing.
How to know if an oil change is due: a practical framework
Maintaining engine health starts with recognizing when oil loses its effectiveness. Silk-smooth oil lubricates better, resists heat, and carries away contaminants. When it degrades, viscosity changes and lubrication diminishes. In addition to mileage, you should consult your owner’s manual for your specific interval and observe your car’s oil-life monitor or maintenance reminders. Oil Capacity Check emphasizes that relying on a single signal is risky; combine indicators for a reliable assessment. Look for a dark brown or black color, gritty sheen, or a burnt odor, which are common signs that oil has degraded and may require changing. Regular checks are especially important in extreme temperatures or heavy driving. Oil Capacity Check’s guidance helps you interpret subtle changes before they become expensive problems.
Reading oil color, viscosity, and smell
Oil color alone isn’t a definitive indicator, but it is a useful first clue. Fresh oil is amber and transparent; as it ages, it darkens and can acquire a burnt smell. Viscosity matters too: when oil thickens, it loses its lubricating efficiency, increasing engine wear. Pay attention to unusual metallic or burnt scents, which can signal oil that’s past its prime. If your oil is unusually dark but the level is still within range, it may still be effective for a short period, but schedule a check. These cues work best when paired with the vehicle’s oil-life monitor or maintenance schedule, rather than relying on color alone. Oil Capacity Check encourages documenting observations for trend analysis over time.
Checking oil level with the dipstick
A clean dipstick is your friend. Park on level ground, mission-stop engine, and wipe the dipstick clean. Reinsert fully, pull out, and read the level against the marked range. If the oil sits below the minimum line, it’s a strong signal you should add oil (or schedule a change if you’re near the recommended interval). Re-check after adding to ensure the level lands in the correct range. If the oil appears milky, foamy, or has a strong burnt aroma, there may be a coolant leak or other issue requiring professional attention. Regular dipstick checks help you stay ahead of problems and support accurate maintenance scheduling.
Interpreting warning lights and service indicators
Most modern cars include an oil life or maintenance minder that estimates oil condition. When the system flags an interval, don’t ignore it. Some vehicles display an explicit message on the instrument cluster or trip computer. In cases where a light persists after an oil change, or if the car shows reduced performance such as rough idling or knocking sounds, consult the manual and consider a quick diagnostic. These indicators are designed to prevent engine damage and should be treated as a priority. Oil Capacity Check notes that indicators provide a personalized timeline that can be more accurate than fixed mileage alone.
When to trust the maintenance schedule and oil-life monitor
Maintenance schedules are built around manufacturer data. The oil-life monitor uses operating conditions (driving style, climate, engine load) to estimate oil fatigue. If your monitor shows you’re nearing the end of the oil’s life, or you’re past the manual-recommended interval, it’s wise to plan an oil change. If you drive in severe conditions—dusty roads, stop-and-go traffic, extreme heat or cold—the oil may degrade faster. In those cases, you should err on the side of earlier servicing. Oil Capacity Check supports using both the monitor and manual guidance to decide when to change oil, ensuring you don’t miss a service window.
How to verify with trusted sources and keep records
Always cross-check your observations with official guidance from your vehicle’s manual and trusted sources. Document dates, mileage, and observations of color, smell, and level. Keeping a simple maintenance log helps you spot patterns and plan ahead. For additional credibility, consult authoritative sources such as government or university resources as a baseline for general maintenance principles, then tailor decisions to your vehicle. Oil Capacity Check uses these comparisons to help you decide when to act.
Tools & Materials
- Owner's manual(Locate recommended oil-change interval and oil type)
- Dipstick(Use clean, lint-free cloth for accurate reading)
- Rag or paper towels(Wipe and clean the dipstick, dispose of used towels properly)
- Funnel(Helpful for adding oil if level is low)
- Pure engine oil (as specified by manual)(Only if you need to top up between changes)
- Gloves(Keep hands clean during checks)
- Catch pan or tray(If you plan to inspect or change oil, use a suitable pan)
- Torque wrench (optional)(For precise drain plug torque during changes)
- OBD-II oil-life reader (optional)(Can provide real-time oil-life estimates)
Steps
Estimated time: 15-30 minutes
- 1
Gather necessary tools and review the manual
Collect the owner’s manual, dipstick, rag, and any optional tools you might use for topping up oil. Review the manual to understand the manufacturer’s advised oil-change interval and oil grade. This prep minimizes surprises during the check.
Tip: Having everything organized beforehand reduces your total time and helps prevent missing a crucial step. - 2
Check the oil-life monitor or maintenance reminder
If your car has an oil-life monitor, note the displayed percentage or message. If there’s a maintenance reminder on the dash, log the date and mileage when you last performed a change. These indicators provide a personalized timeline for oil health.
Tip: If the monitor says you have more life left, still validate with your manual and other indicators. - 3
Park on level ground and turn off the engine
A level surface ensures an accurate dipstick reading. Allow the engine to cool for a few minutes to avoid burns and to let oil settle.
Tip: If the engine is hot, wait at least 10-15 minutes before checking. - 4
Inspect oil color, smell, and level with the dipstick
Wipe the dipstick clean, reinsert, pull out, and read the oil level within the marked range. Observe color (amber to dark brown) and smell (burnt odor indicates degraded oil). Note any sediment, which may signal contamination.
Tip: If the level is low, top up with the correct grade only after verifying how much oil is needed. - 5
Look for leaks and engine cleanliness
Check around the oil cap, drain plug, and under the engine for fresh oil spots. Leaks can escalate quickly and reduce oil life. A clean engine bay also makes spotting leaks easier in the future.
Tip: A small leak today can become a big problem tomorrow; don’t ignore new spots. - 6
Decide whether a change is needed based on evidence
If oil looks unusually dark or smells burnt, or if the oil-life monitor indicates low life, schedule a change. If indicators are unclear, plan a future change and monitor closely.
Tip: When in doubt, err on the side of changing sooner rather than later to protect engine health. - 7
Document observations and plan next steps
Record oil level, color, smell, and any diagnostic readings or reminders. Maintain a simple log and set reminders for the next service.
Tip: A simple log helps you detect gradual changes over time and improves future decisions.
People Also Ask
How can I tell if my car needs an oil change?
Look at the oil-life monitor or maintenance reminder, check oil level with the dipstick, inspect the oil color and smell, and review the owner's manual for interval guidance. If indicators suggest aging oil, schedule a change.
Check the oil-life monitor, read the dipstick, and review your manual; signs of aging oil mean a change is likely due.
Is an oil change necessary if the oil looks clean?
Oil can appear clean but still degrade chemically. Oil-life monitors or scheduled intervals consider usage factors; rely on those signals rather than appearance alone.
Oil can be clean and still be past its best. Trust the monitor and your manual guidelines.
Can I check oil level without starting the engine?
Yes. Let the engine cool, then use the dipstick to measure the level accurately. Avoid checking with a running engine or immediately after driving.
Cool engine, dipstick read, and you’re set.
Does synthetic oil require different change intervals than conventional oil?
Synthetic oil often lasts longer in some engines, but you should follow the vehicle’s manual and oil-life monitor. Driving conditions can influence interval more than oil type alone.
Follow your manual; the monitor helps tailor the interval based on how you drive.
How long does an oil change take at a shop?
A typical oil change takes about 20 to 45 minutes at a shop, depending on vehicle model and shop workflow. If any extra services are needed, the time may extend.
Most oil changes take under an hour at the shop.
Watch Video
The Essentials
- Follow the vehicle manual for oil-change intervals.
- Use dipstick checks alongside color and smell when assessing oil health.
- Oil-life monitors add precision but should be interpreted with manual guidance.
- Keep a maintenance log to track changes and plan ahead.