How to Check If an Oil Change Was Done
Learn practical methods to verify an oil change was completed, using receipts, service logs, dipstick checks, and maintenance records. A DIY-friendly approach from Oil Capacity Check.

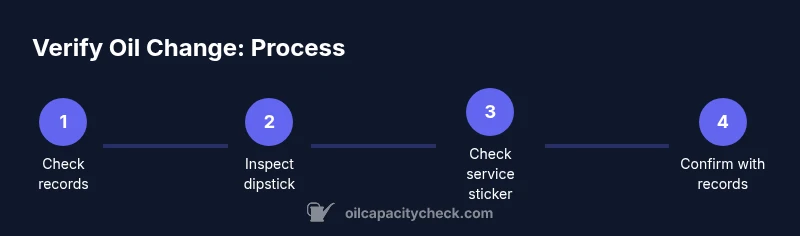
To verify an oil change was completed, start with the service receipt or maintenance log, confirm the date and mileage matches your trip. Check for fresh oil residue around the dipstick, a clean oil fill cap, and the vehicle’s service sticker. If in doubt, run a quick oil level check.
Why verifying an oil change matters
Maintaining accurate maintenance records is essential for engine health and resale value. Oil changes affect lubrication, cooling, and wear patterns; confirming a service was performed helps prevent confusion about maintenance history. For DIY enthusiasts, a simple verification process can save time and avoid miscommunication with a shop. According to Oil Capacity Check, keeping a consistent verification routine reduces the risk of gaps in your maintenance log and provides peace of mind when you plan future services. This section lays out clear, actionable steps you can take using receipts, stickers, and in-car indicators.
Key idea: verification builds trust between you and your vehicle’s service history, ensuring you aren’t guessing about maintenance status.
Visual cues you can inspect
A quick physical check can reveal whether an oil change occurred. Look for a clean, readable service sticker applied near the hood hinge, door jamb, or windshield—these stickers typically show the date and mileage of the last service. Inspect the oil fill cap: a recently replaced cap or one with fresh grime-free edges suggests recent work. Examine the dipstick for signs of clear, clean oil rather than dark, opaque oil, which can indicate older service. Note that some shops reset the oil change reminder light or digital records instead of applying stickers, so don’t rely on a single cue.
If you observe multiple positive indicators (receipt, sticker, and clean dipstick), the odds of a completed oil change are higher. If only one cue exists, proceed with the formal verification steps described below.
Checking service records and receipts
Service receipts typically list the vehicle’s make/model, service date, mileage, and a short description such as “oil change.” Compare the recorded mileage with the odometer reading at the time of inspection. If you have access to the dealership’s or shop’s maintenance portal, you can cross-check the entry against your vehicle’s VIN. Digital records may include notes about oil type, filter changes, and whether a drain plug gasket was replaced. If you see a discrepancy between what you expect and what’s documented, contact the service provider for clarification. Oil Capacity Check recommends keeping both a physical receipt and a digital copy for redundancy.
For readers who track maintenance in a calendar or app, add a reminder to review records after each service to ensure consistency across platforms.
How to perform a quick oil level check safely
Safety first: park on a level surface, engine cold, and wear gloves if possible. Locate the dipstick, pull it out, wipe clean, reinsert fully, and pull again to read the level. Compare the reading to the marked range on the dipstick; if it’s near or above the minimum and below the maximum, the oil level is acceptable for driving. If the dipstick looks unusually dirty or has an unusual color, it may indicate contamination or an incomplete oil change. Remember to replace the dipstick cap firmly afterward.
Tip: take a quick photo of the dipstick reading for your records, and note the oil color in your maintenance log.
Cross-check with the vehicle's maintenance history
Some vehicles have built-in maintenance history accessible via the infotainment system or a linked app. If your car supports this feature, verify the last service entry shows an oil change with correct date, mileage, and service provider. For vehicles without digital history, rely on receipts and stickers combined with dipstick checks. If there is a mismatch between the digital history and physical records, request a corrected entry from the shop or mechanic. Oil Capacity Check emphasizes minimizing gaps by consolidating records from multiple sources.
What to do if you suspect it wasn't done
If you have strong reasons to doubt an oil change occurred, contact the service provider promptly and request proof of service (receipt, work order, or photos). If the shop cannot provide documentation, consider scheduling a follow-up oil change to ensure engine lubrication is up to date. In cases of potential warranty or safety concerns, document your communications and seek guidance from the vehicle manufacturer or an independent mechanic. Oil Capacity Check notes that proactive verification protects both your engine and your wallet.
Practical tips for future verification
Keep a dedicated maintenance folder (digital and physical) for every service. Take clear photos of receipts, service stickers, and the dipstick at the time of service. If a shop uses digital records, ask for access to the portal or a shareable PDF. Set reminders for the next oil change based on the vehicle’s manual and your driving habits. By integrating these steps, you’ll reduce uncertainty and maintain a reliable service history.
Tools & Materials
- Service receipt or digital maintenance record(Date, mileage, and service description should clearly show 'oil change'.)
- Maintenance sticker (if present)(Look for date and mileage; location varies by vehicle.)
- Dipstick and oil cap(Inspect for freshness and cleanliness.)
- Flashlight(Useful for inspecting the dipstick area in dim light.)
- Smartphone or camera(Capture photos of receipts, dipstick readings, and stickers.)
- Owner’s manual or service portal access(Reference for where records are stored in your vehicle or online.)
Steps
Estimated time: Total time: 15-25 minutes
- 1
Gather documentation
Locate the service receipt or digital maintenance record. Verify the date and mileage match your vehicle’s odometer and that the description clearly states an oil change.
Tip: If you can’t find a receipt, call the shop for a duplicate or view the digital portal if available. - 2
Inspect the service sticker
Check for a sticker near the windshield, hood, or door jamb with the oil-change date and mileage. If present, confirm it aligns with the receipt.
Tip: Stickers vary by shop; absence doesn’t always mean a service wasn’t performed. - 3
Check the dipstick area for fresh marks
With the engine off, pull the dipstick, wipe, reinsert, and read the level. Look for a recent oil color or a clean reservoir indicating fresh oil.
Tip: Take a photo of the dipstick and note the color alongside the service date. - 4
Evaluate oil color and cap
Examine the oil color in the reservoir and on the cap. Bright or amber oil with a clean cap suggests a recent oil change; very dark oil can indicate older service or contamination.
Tip: If the oil appears murky or has an unusual odor, seek a professional assessment. - 5
Cross-check maintenance history
If your vehicle supports a digital history, compare the last entry to the receipt. Look for consistency in date, mileage, and service provider.
Tip: Ask for a downloaded history log if you’re unsure what’s stored in-app. - 6
Document findings and plan next steps
Summarize what you found (receipt, sticker, dipstick, digital history). Decide whether to rely on the current record or schedule a follow-up check.
Tip: Keep your notes organized in one place for easy reference at future services.
People Also Ask
What documents prove an oil change was completed?
The best proof is a dated service receipt or a digital maintenance record showing the oil change. A service sticker is helpful but not universal. Always cross-check with the dipstick reading for added confidence.
The best proof is a dated receipt or digital record showing an oil change. A service sticker helps, but it isn’t universal; cross-check with the dipstick as well.
Can a service sticker mislead you?
Stickers are helpful but not always present. Some shops don’t use stickers or replace them after a future service. Always corroborate with receipts and dipstick checks.
Stickers help, but they aren’t guaranteed. Always check receipts and the dipstick to be safe.
Is a dipstick oil level check enough to verify an oil change?
A dipstick check alone confirms oil level, not service history. Use it in conjunction with receipts and records to verify an oil change.
A dipstick check confirms level, not history. Combine it with receipts for verification.
What should I do if the receipt shows a different date than the service sticker?
Ask the shop for clarification and, if needed, obtain a corrected entry. Inconsistent records can indicate a documentation error or multiple services.
If dates don’t match, contact the shop for clarification and a corrected record.
How accurate is the odometer reading for oil-change timing?
Odometer readings help verify timing against the receipt but can be less reliable if the car was moved without a service. Always rely on official records as the primary source.
Odometer timing helps but use official records as the primary source.
How long does it take for fresh oil to look clearly different from old oil?
Fresh oil can look noticeably lighter in color immediately after an oil change. If the oil appears unusually dark or murky, there may be an issue worth inspecting.
Fresh oil often looks lighter right after a change; very dark oil may warrant a check.
Watch Video
The Essentials
- Verify using receipts and digital records first.
- Cross-check dipstick, cap, and sticker for consistency.
- Compare mileage to service entries to confirm timing.
- If in doubt, contact the shop for proof of service.
- Maintain a digital log for future verifications.