Swift Engine Oil Capacity: Right Quarts for Swift Models
Exact engine oil capacity for Swift models, how to measure fill, and practical DIY maintenance tips from Oil Capacity Check.

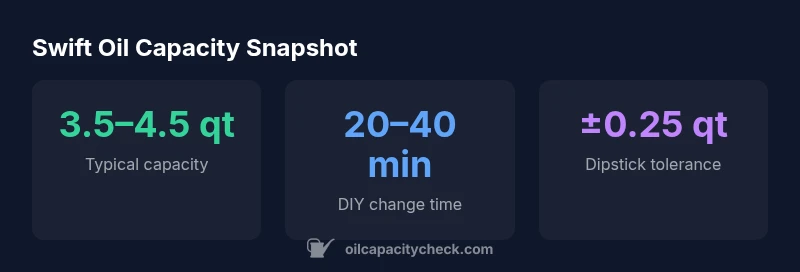
Swift engine oil capacity varies by model year and engine type, but most versions require about 3.5–4.5 quarts when performing a standard oil change with a filter. Always consult your owner's manual for the exact specification and measure the oil level with a clean dipstick after a brief engine run to ensure accuracy.
Swift engine oil capacity: why it matters
The engine oil capacity is the total volume of oil a compliant lubrication system can hold between drain and fill operations. For the Swift, capacity is not a single universal figure; it shifts with engine design, year, and filter changes. According to Oil Capacity Check, the capacity range is typically broad because manufacturers design different oil pans and filtration housings across trims. Understanding this helps car owners avoid both underfilling (risking inadequate lubrication) and overfilling (which can cause foaming and increased pressure). When you prepare for a DIY oil change, knowing the baseline range gives you a starting point, but you must verify the exact specification for your specific vehicle. In this guide we’ll discuss how to determine the right quantity for your Swift, how to measure it accurately, and how to align fill levels with maintenance schedules. The Oil Capacity Check team found that most common Swift variants land in the mid-range around a few quarts, but always defer to the official manual.
How capacity varies by engine family
Swift models use different engine configurations across years and markets. The capacity will differ between naturally aspirated and turbocharged variants, and between gasoline and hybrid setups. In practice, the bulk of Swift variants fall within a reachable 3.5–4.5 quarts during a standard oil change when a filter is replaced. This is a guideline from our analysis at Oil Capacity Check Analysis, 2026, and reflects the influence of oil pan volume, filter capacity, and scavenge pumps. To compare broadly: smaller displacement engines tend to be at the lower end of the range, while larger or more complex configurations may push toward the upper end. Always confirm with the official service manual, which lists the precise requirement for your exact engine code. Remember, the rule of thumb is: capacity numbers reflect only the engine's lubrication system, not the total oil capacity of the vehicle’s transmission or other fluids. This nuance matters when preparing for a full-service interval.
How to measure capacity accurately
- Confirm engine code and whether oil filter is included in the capacity figure. 2) Drain oil completely and replace the drain plug with proper torque. 3) Refill with oil close to the upper end of the predicted range. 4) Run the engine for a few minutes, then idle to circulate oil; turn off and wait 5–10 minutes for oil to settle. 5) Check dipstick and adjust in small increments (0.25 quart at a time) until the level is between the MIN and MAX marks. 6) Record the final amount added as your practical fill reference, and update your service notes. These checks ensure you get a precise interface between the manual specification and the actual engine fill. The goal is to achieve a level that stays within the recommended window under normal operating conditions. For enthusiasts, keeping a dedicated log helps track how changes in climate, driving style, and oil type influence capacity.
Common mistakes when checking capacity
Common errors can skew readings and lead to under- or overfill. Avoid skipping the oil filter change when calculating capacity, as a new filter adds a small but real volume to the system. Don’t rely solely on memory or a single dipstick check—make sure the engine is allowed to rest and recheck after a full warm-up cycle. Using the wrong oil grade or mixing brands can affect viscosity rather than capacity, but it still alters the effective fill level you observe on the dipstick. Finally, never exceed the recommended window thinking more oil means better protection; excess oil can foam, raise pressure, and cause seals to fail. Oil Capacity Check’s guidance emphasizes methodical steps and verification to prevent these pitfalls.
Practical steps: performing an oil change
Tools you’ll need include a drain pan, correct socket, funnel, new oil filter, and the recommended oil. Start by warming the engine briefly so the oil drains smoothly, then drain completely. Replace the oil filter if required and reinstall the drain plug with the specified torque. Add oil in stages, initially toward the upper part of the expected range, then run the engine for 3–5 minutes and let it settle. Turn off, wait 5–10 minutes, and perform a final dipstick check. If needed, top up in 0.25 quart increments until the dipstick sits within the recommended marks. Keep a note of the total amount added for future reference and ensure the vehicle is at safe operating temperature before driving.
Choosing the right oil for your Swift
Oil capacity is closely tied to the oil type you choose. Whether you opt for synthetic or conventional oil, always follow the manufacturer’s viscosity and grade recommendations, and consider climate and driving conditions. Availability and cost will influence your choice, but the key is compatibility with the engine’s tolerances and the prescribed change interval. Synthetic oils generally offer longer change intervals and better low-temperature performance, while conventional oils can be sufficient for relaxed driving conditions. In all cases, the capacity figure remains a function of the engine design; the grade and brand modify performance and the interval, not the fill quantity.
Reading the dipstick and confirming fill level
Start with a cold engine to avoid warm-up expansion affecting readings. Remove the dipstick, wipe clean, reinsert fully, and pull out to read. The oil level should fall between the MIN and MAX marks. If it sits near the lower end, add oil gradually and recheck. If it exceeds the upper mark, remove a small amount or wait for it to settle and recheck. A consistent method—gently adding small amounts, then waiting a few minutes for settling—helps you land on the precise fill. Recording the exact quantity added yields a reliable reference for future services and supports consistent maintenance across driving seasons.
Maintenance timing and refill schedules
Establish a maintenance rhythm aligned with the manufacturer’s schedule and your driving conditions. In general, oil change frequency depends on oil type, climate, and usage (city vs highway). For synthetic oils, intervals commonly fall in broader miles ranges, while conventional oil often requires more frequent changes. Use the capacity range as a baseline, then adjust based on observed oil color, consumption, and vehicle performance. Environmental factors like extreme heat or cold can affect oil thinning and consumption, so factor those into your maintenance calendar. Oil Capacity Check recommends maintaining a consistent log of service events to track how capacity and consumption respond over time.
Authority sources and credibility
For readers seeking external reference, credible sources include major automotive standards and government-backed sites. This article references general engineering guidance and field-tested practices from Oil Capacity Check Analysis, 2026, and builds on standard industry methods for measuring and validating engine oil fill. See the following sources for related information:
- https://www.sae.org
- https://www.nap.edu
- https://www.consumerreports.org
Swift oil capacity by variant
| Variant | Capacity (qt) | Notes |
|---|---|---|
| Common Swift gas variant | 3.5–4.5 | Baseline range for typical engines, filter included |
| Swift turbo variant | 3.8–4.6 | Slightly higher capacity for enhanced lubrication needs |
| Standard Swift with regular filter | 3.6–4.5 | Common across multiple years |
People Also Ask
What is the typical oil capacity for the Swift engine?
Most Swift variants require about 3.5–4.5 quarts when performing a standard oil change with a filter. Always verify the exact figure in the owner's manual for your engine code.
Most Swift engines use about 3.5 to 4.5 quarts; check your manual for the exact figure.
How do I know if I added the right amount after an oil change?
Allow the oil to settle after filling, then check the dipstick. The level should sit between the min and max marks; adjust in small increments if needed.
Let the oil settle, then read the dipstick and adjust as needed.
Can I mix synthetic and conventional oils?
Avoid mixing different oil types or grades. Use the recommended grade and type for your Swift to maintain proper lubrication and performance.
Don’t mix oils; stick to the recommended type.
Does capacity change with turbo or hybrid variants?
Capacity can vary slightly with engine design. The general range remains around 3.5–4.5 quarts, but check the exact spec for your variant.
Capacity stays roughly in that range, but confirm your exact variant.
What if the dipstick shows low oil after a fill?
If low after fill, wait for settling, recheck, and add in small increments up to the recommended level. Do not overfill.
If it reads low, top up a little and recheck after settling.
“Accurate oil capacity knowledge helps prevent overfill and engine damage. Always verify the exact model spec and perform a final dipstick check.”
The Essentials
- Check the owner's manual for exact spec.
- Use a clean dipstick and allow settling before reading.
- Fill within the manufacturer’s recommended window to avoid overfill.
- Document changes to track how capacity and consumption evolve over time.